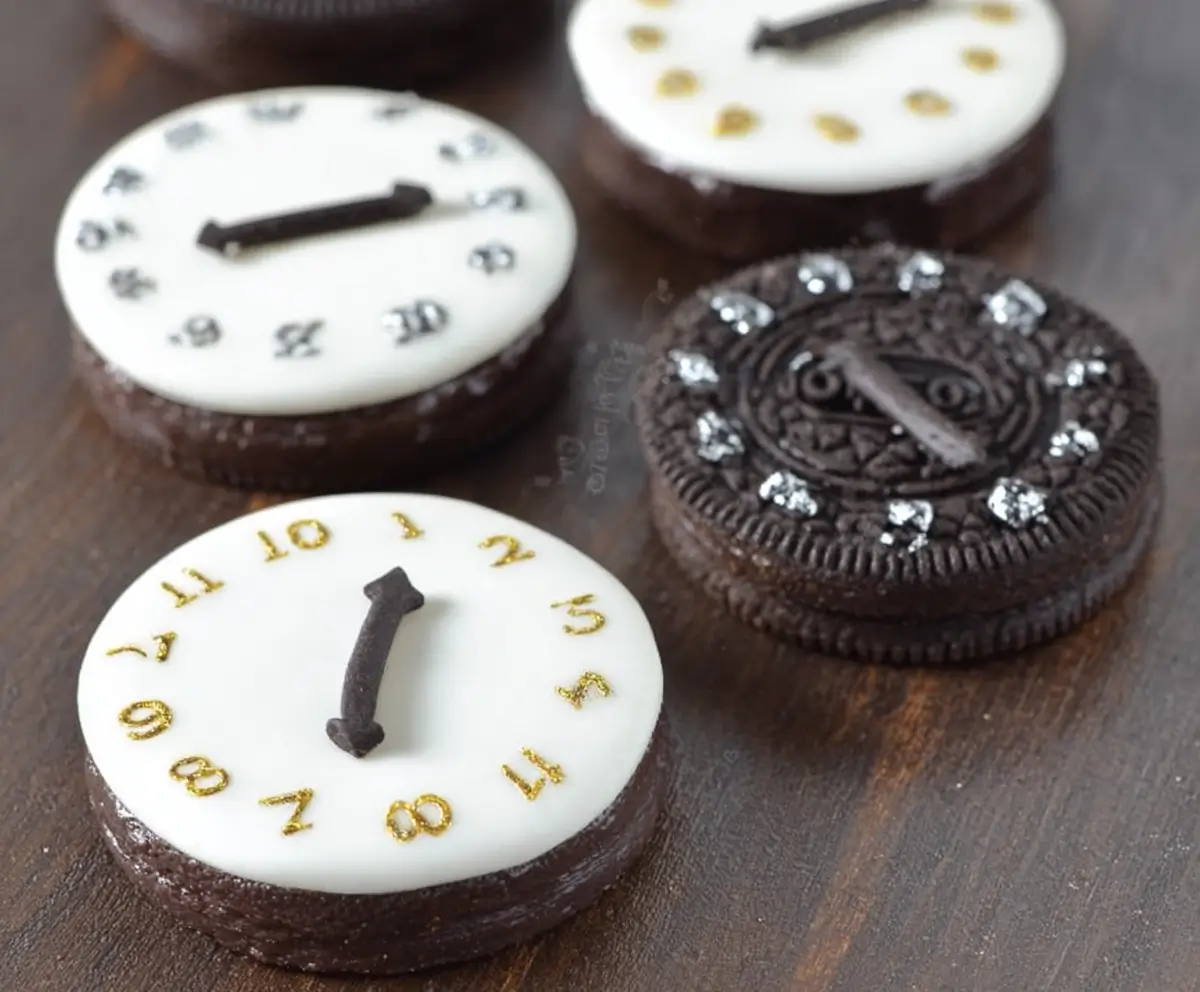
Looking for a playful and delicious treat to celebrate the New Year? These Oreo Clock Cookies are the perfect choice! Simple yet charming, they transform ordinary Oreo cookies into festive clocks, making them a fun project for both kids and adults. With minimal ingredients and easy decorating steps, you can create a unique, eye-catching dessert to ring in the New Year.
The concept is delightfully simple: white fondant serves as the clock face, decorative pearls mark the hours, and a little edible ink or paint creates the clock hands pointing just before midnight. These cookies are not only visually appealing but also delicious, combining the classic chocolate and cream flavors of Oreos with the sweet, smooth texture of fondant.
Whether you’re hosting a New Year’s Eve party or looking for a creative dessert for your family, these Oreo clocks will impress guests and add a festive touch to your celebration.
Ingredients
- Oreo cookies (as many as needed for your batch)
- White fondant
- Small round cookie cutter or fondant cutter (slightly smaller than the Oreos)
- Edible pearls (large and small for hour markers)
- Edible black food marker or black food coloring with a small paintbrush
- Optional: chocolate spread or icing to attach the fondant
Equipment
- Rolling pin
- Small round cutter or cookie cutter
- Paintbrush (if using food coloring instead of marker)
- Plate or tray for decorating
Instructions
Step 1: Prepare the Fondant Clock Faces
- Roll out the white fondant to a thin layer, about 2 millimeters thick.
- Use a small round cutter slightly smaller than your Oreo cookies to cut out circles from the fondant. These will serve as your clock faces.
Step 2: Add Hour Markers
- Place 4 large edible pearls on the fondant circles at the positions of 12, 3, 6, and 9 o’clock.
- Optional: Use smaller pearls to mark the hours in between for a more detailed clock.
- Allow the fondant to air dry for about 30 minutes. This makes it easier to draw the clock hands without smudging.
Step 3: Draw the Clock Hands
- Use an edible black food marker or food coloring with a small brush to mark a small dot in the center of each clock face.
- From the center dot, draw the hour and minute hands. Position the small hand at 12 and the large hand slightly before 12, mimicking the moments just before midnight.
Step 4: Assemble the Oreo Clocks
- Spread a small amount of chocolate spread or icing on the top of each Oreo cookie.
- Carefully place the fondant clock face on top of the cookie, pressing gently to secure it.
Step 5: Serving and Storage
- Your Oreo Clock Cookies are now ready to serve! They make a charming addition to any New Year’s Eve dessert table.
- Store in an airtight container for up to 2 weeks.
Tips and Tricks

- Fondant Thickness: Rolling the fondant too thick may make it difficult to attach to the cookies. Aim for 2 millimeters for easy handling.
- Pearl Placement: Use tweezers or the back of a small paintbrush to place tiny pearls precisely on the fondant.
- Hands Placement: Drawing the hands slightly before 12 adds drama and builds anticipation for the New Year!
- Creative Variations: Try using different colored fondants or sprinkles for a more festive and colorful look.
Frequently Asked Questions (FAQs)
1. Can I make these cookies ahead of time?
Yes, you can prepare the Oreo cookies and fondant decorations separately in advance. Assemble them shortly before serving for the best appearance.
2. Can I use store-bought fondant?
Absolutely. Pre-colored or pre-flavored fondant works perfectly. White fondant is ideal for a classic clock look.
3. What if I don’t have edible pearls?
You can substitute small sugar pearls, mini candies, or even tiny dots of icing for the hour markers.
4. Can children help make these?
Yes! Oreo Clock Cookies are a fun, easy craft for kids, but adult supervision is recommended for drawing the clock hands.
5. How do I prevent the fondant from sliding off the Oreo?
Use a small amount of chocolate spread or icing as “glue” to keep the fondant securely attached.
Final Thoughts
Oreo Clock Cookies are a festive, fun, and surprisingly easy way to celebrate the New Year. They combine the familiar deliciousness of Oreos with a creative twist, resulting in a dessert that’s as fun to make as it is to eat. With their simple yet elegant design, these cookies are perfect for parties, gifts, or just a whimsical treat to enjoy while counting down to midnight.
Bring a little creativity to your holiday table with these charming Oreo clocks—they’re a sweet way to mark the passing of time and welcome the new year in style!
Print
Oreo Clock Cookies: A Fun and Festive Treat for New Year’s Eve
- Total Time: 15 minutes
- Yield: 1 schaal vol
- Diet: Vegetarian
Description
Simpel maar heerlijk Oreo koekjes versierd als klokken voor Oud en Nieuw.
Ingredients
- Oreo’s
- Witte fondant
- Kleine ronde uitsteker
- Parels (groot en klein)
- Eetbare zwarte stift (of kleurstof en kwastje)
Instructions
- Rol fondant dun uit (ongeveer 2 mm dikte) en steek cirkels uit die iets kleiner zijn dan de Oreo koekjes.
- Plaats 4 grote parels op 12, 3, 6 en 9 uur. Gebruik kleine pareltjes voor de tussenliggende tijden.
- Laat het fondant iets drogen zodat de wijzers makkelijker te tekenen zijn.
- Teken met de zwarte stift eerst een punt in het midden van de klok en daarna de wijzers. De kleine wijst naar 12, de grote wijst bijna naar 12.
- Smeer glazuur of chocopasta op de Oreo’s en bevestig de fondant klokjes erop.
Notes
- Bewaren in een afgesloten trommel tot 2 weken.
- Prep Time: 15 minutes
- Cook Time: 0 minutes
- Category: Dessert, Snack
- Method: No-Bake
- Cuisine: Dutch