
Crispy, golden, and irresistibly juicy — chicken cutlets are the kind of comfort food that never goes out of style. Whether you enjoy them with a squeeze of lemon, layered in a sandwich, or served alongside a crisp salad, chicken cutlets deliver the perfect combination of crunch and tenderness in every bite.
This classic dish is beloved for its simplicity and versatility. With just a few pantry ingredients and easy steps, you can transform plain chicken breasts into a delicious, restaurant-quality meal at home.
In this detailed guide, we’ll walk you through how to make perfect chicken cutlets from start to finish, including preparation techniques, cooking tips, serving ideas, and answers to the most frequently asked questions.
Ingredients
For the Chicken:
- 2 large boneless, skinless chicken breasts
- Salt & black pepper to taste
- ½ tsp garlic powder
- ½ tsp paprika
the Breading:
- 1 cup all-purpose flour
- 2 large eggs, beaten
- 1 cup breadcrumbs (plain or seasoned)
- ½ cup grated Parmesan cheese (optional)
For Frying:
- ½ cup vegetable oil (or olive oil)
For Serving:
- Lemon wedges
- Fresh parsley for garnish
How to Make Chicken Cutlets
Step 1: Prepare the Chicken
Start with two large boneless, skinless chicken breasts. To make even cutlets, slice each breast horizontally in half, creating four thinner pieces.
Place each piece between two sheets of plastic wrap (or parchment paper) and gently pound them with a meat mallet or rolling pin until they’re about ½ inch thick. This ensures even cooking and tender results.
Season both sides of the cutlets with salt, black pepper, garlic powder, and paprika. The light seasoning enhances the chicken’s natural flavor and creates a perfect base for the crispy coating to come.
Step 2: Bread the Chicken
Set up your breading station using three shallow bowls or plates:
- Flour in the first bowl — this helps the egg mixture adhere to the chicken.
- Beaten eggs in the second bowl — they act as the glue that holds the breadcrumbs in place.
- Breadcrumbs and Parmesan in the third bowl — this forms the crispy, flavorful outer coating.
Working one cutlet at a time:
- Dredge it first in the flour, shaking off any excess.
- Dip it into the beaten eggs, coating both sides evenly.
- Finally, press it firmly into the breadcrumb mixture, making sure it’s fully coated.
If you’re using Parmesan, it adds a wonderful nutty flavor and extra crispness to the crust.
For best results, place the breaded cutlets on a plate and let them rest for about 10 minutes before frying — this helps the coating adhere firmly and prevents it from falling off during cooking.
Step 3: Fry the Cutlets
Heat ½ cup of vegetable oil (or olive oil) in a large skillet over medium heat. You want the oil hot enough to sizzle when you drop in a breadcrumb, but not so hot that the cutlets burn before cooking through.
Once the oil is ready, add the chicken cutlets in batches, being careful not to overcrowd the pan. Fry each piece for 3–4 minutes per side, or until golden brown and crispy.
The goal is a deep golden crust that’s crisp on the outside and juicy on the inside. Use tongs to turn the cutlets gently, and transfer them to a paper towel-lined plate once done to absorb any excess oil.
Step 4: Serve and Enjoy
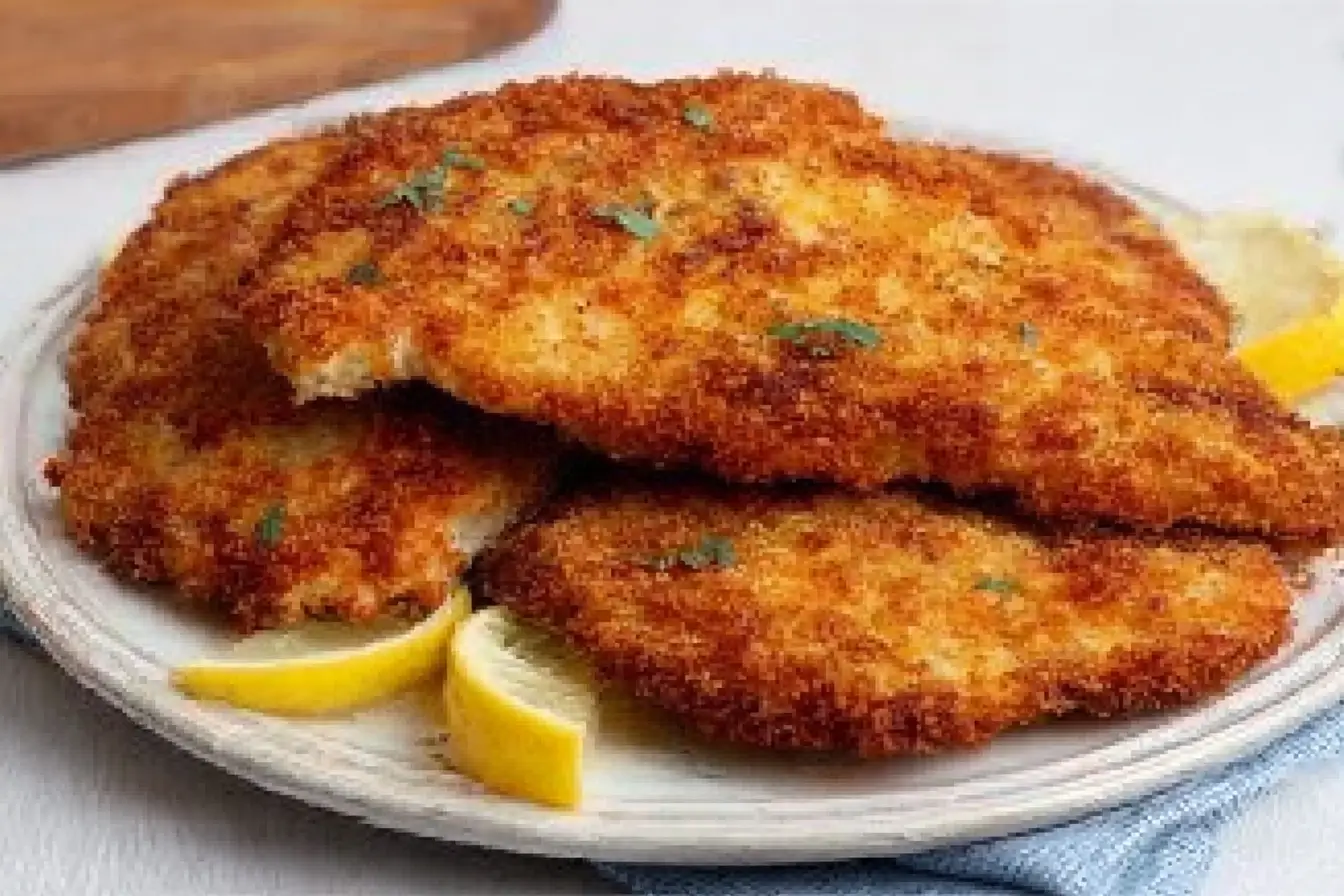
Serve your freshly fried chicken cutlets warm, with lemon wedges on the side for a zesty finish. A sprinkle of chopped fresh parsley adds a pop of color and freshness.
These cutlets are incredibly versatile — enjoy them on their own, layer them in sandwiches, top them with marinara sauce and mozzarella for an Italian-style twist, or serve alongside mashed potatoes or pasta for a hearty meal.
Nutritional Information (per cutlet, approx.)
- Calories: 340
- Protein: 30g
- Carbohydrates: 20g
- Fat: 14g
This balance makes chicken cutlets a satisfying yet relatively light main course option, perfect for family dinners or meal prep.
Cooking Tips for Perfect Chicken Cutlets
- Use Even Thickness: Pounding the chicken ensures it cooks evenly and stays juicy throughout.
- Don’t Skip the Flour Step: The flour acts as a base layer that helps the egg and breadcrumbs stick firmly.
- Control the Heat: Keep the oil at a steady medium heat. If it’s too low, the coating will absorb oil and turn soggy; too high, and it’ll burn before the chicken cooks.
- Let the Cutlets Rest: Allowing the breaded chicken to rest before frying helps the coating stay intact.
- Drain Properly: Always place cooked cutlets on paper towels or a wire rack to keep them crisp.
Serving Suggestions
Chicken cutlets are a true kitchen multitasker — they pair beautifully with a variety of sides and can be used in countless dishes. Here are some great ways to serve them:
- Classic Dinner Plate: Pair with mashed potatoes, green beans, or roasted vegetables for a well-rounded meal.
- Italian-Style: Top the cutlets with marinara sauce and melted mozzarella for easy chicken parmigiana.
- In Sandwiches: Layer on a soft bun with lettuce, tomato, and mayo for a crispy chicken sandwich.
- With Pasta: Serve alongside creamy Alfredo pasta or spaghetti aglio e olio for a comforting dinner.
- In Salads: Slice the cutlets and serve over Caesar salad or mixed greens for a lighter option.
Variations to Try
- Herb Crusted Cutlets: Mix dried basil, oregano, and thyme into the breadcrumb mixture for extra flavor.
- Spicy Chicken Cutlets: Add cayenne pepper or chili flakes to the seasoning for a mild kick.
- Panko-Crusted Cutlets: Use Japanese panko breadcrumbs for a lighter, crunchier coating.
- Oven-Baked Version: For a healthier option, bake the breaded chicken at 400°F (200°C) for 18–20 minutes, flipping halfway through. Spray lightly with oil before baking for a crispy finish.
- Air Fryer Method: Cook at 375°F (190°C) for about 10–12 minutes, flipping halfway, for crispy results with less oil.
Common Mistakes to Avoid
- Skipping the Pounding Step: Uneven chicken thickness leads to uneven cooking — some parts may dry out before others are done.
- Using Cold Chicken: Let the chicken come to room temperature for 10–15 minutes before frying to ensure even cooking.
- Overcrowding the Pan: Frying too many cutlets at once lowers the oil temperature, resulting in soggy coating.
- Using Old Oil: If the oil looks dark or starts smoking, replace it. Fresh oil ensures a clean, crisp fry.
- Not Seasoning Enough: Season each layer — the chicken, the flour, and the breadcrumbs — for maximum flavor.
Make-Ahead and Storage Tips
- To Refrigerate: Store cooked cutlets in an airtight container for up to 3 days. Reheat in the oven at 350°F (175°C) for 10 minutes to restore crispiness.
- To Freeze: Let cutlets cool completely, then freeze individually on a baking sheet before transferring to freezer bags. They’ll keep for up to 2 months.
- To Reheat: Bake from frozen at 375°F (190°C) for 20–25 minutes or until heated through and crispy again.
These make-ahead options are perfect for busy weeknights — just reheat and serve with your favorite sides.
Frequently Asked Questions (FAQs)
Q1: Can I use chicken tenders or thighs instead of breasts?
Yes! Chicken tenders work well and require less pounding. Thighs are juicier but may need slightly longer cooking time.
Q2: How can I make the coating extra crispy?
Use panko breadcrumbs and let the breaded cutlets rest before frying. Fry in batches so the oil stays hot and crispiness is maintained.
Q3: Can I bake chicken cutlets instead of frying?
Definitely. Brush or spray with oil and bake at 400°F (200°C) for 18–20 minutes, flipping once. They’ll be lighter but still crunchy.
Q4: What oil is best for frying?
Vegetable oil, canola oil, or light olive oil are ideal because they have high smoke points and neutral flavors.
Q5: Can I make chicken cutlets gluten-free?
Yes! Use gluten-free flour and breadcrumbs to create a gluten-free version without sacrificing texture or flavor.
Q6: How do I keep the coating from falling off?
Make sure the chicken is dry before breading, press the breadcrumbs firmly, and let the cutlets rest before frying.
Q7: What can I serve with chicken cutlets?
They pair wonderfully with mashed potatoes, rice pilaf, salad, pasta, or steamed vegetables. For a lighter option, serve with lemon wedges and a simple green salad.
Conclusion
Making chicken cutlets at home is easier than you might think — and once you master this method, you’ll never go back to store-bought versions. The combination of tender, juicy chicken and a crispy golden crust is pure comfort food perfection.
This recipe’s beauty lies in its versatility: serve it for dinner, pack it for lunch, or transform it into sandwiches and pasta dishes. With a few simple ingredients and straightforward steps, you can create a dish that looks impressive, tastes delicious, and fits any occasion.
So grab your skillet, heat up that oil, and enjoy the satisfying crunch of homemade chicken cutlets — crispy on the outside, juicy on the inside, and absolutely irresistible every single time.
Print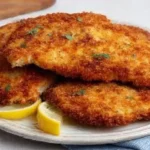
How to Make Chicken Cutlets – Simple Step-by-Step Recipe
Description
Crispy, golden, and juicy — these Chicken Cutlets are an easy weeknight favorite! Breaded to perfection and fried until tender inside and crunchy outside, they’re perfect on their own, in sandwiches, or with pasta.
Ingredients
- For the Chicken:
- 2 large boneless, skinless chicken breasts
- Salt & black pepper to taste
- ½ tsp garlic powder
- ½ tsp paprika
- For the Breading:
- 1 cup all-purpose flour
- 2 large eggs, beaten
- 1 cup breadcrumbs (plain or seasoned)
- ½ cup grated Parmesan cheese (optional)
- For Frying:
- ½ cup vegetable oil (or olive oil)
- For Serving:
- Lemon wedges
- Fresh parsley for garnish
Instructions
- Prepare the Chicken: Slice each chicken breast in half horizontally to make thin cutlets. Place between sheets of plastic wrap and gently pound to even thickness (about ½ inch). Season both sides with salt, pepper, garlic powder, and paprika.
- Bread the Chicken: Set up three bowls: one with flour, one with beaten eggs, and one with breadcrumbs mixed with Parmesan. Dredge each cutlet first in flour, then in egg, and finally coat with breadcrumbs. Press lightly so the coating sticks.
- Fry the Cutlets: Heat oil in a large skillet over medium heat. Fry each cutlet for 3–4 minutes per side, or until golden brown and cooked through. Transfer to a paper towel-lined plate to drain excess oil.
- Serve & Enjoy: Serve warm with lemon wedges and a sprinkle of parsley. Enjoy as-is, or use in sandwiches, salads, or pasta dishes.
Notes
- For extra crispy cutlets, use panko breadcrumbs instead of regular ones.
- To make ahead, bread the chicken and refrigerate up to 24 hours before frying.
- These cutlets can also be baked at 400°F (200°C) for about 20 minutes if you prefer less oil.