Introduction
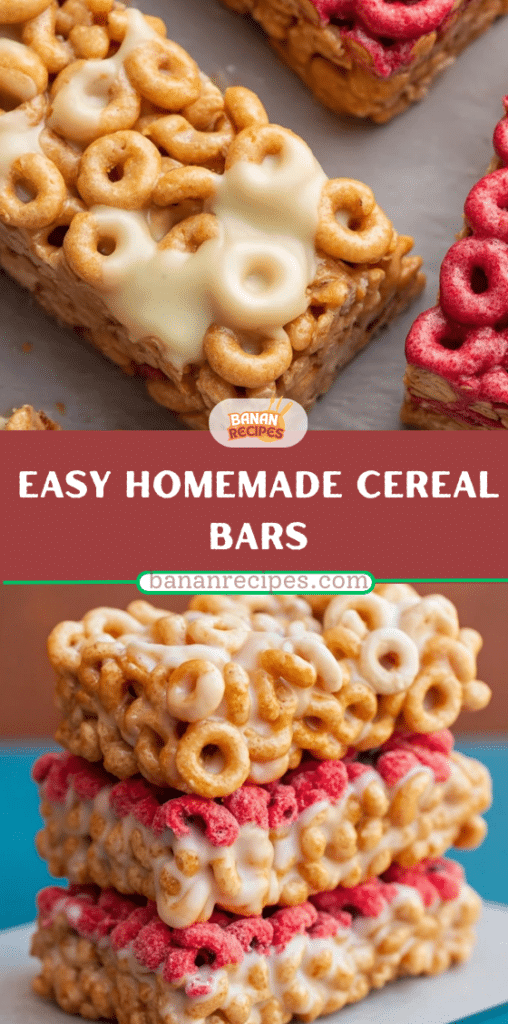
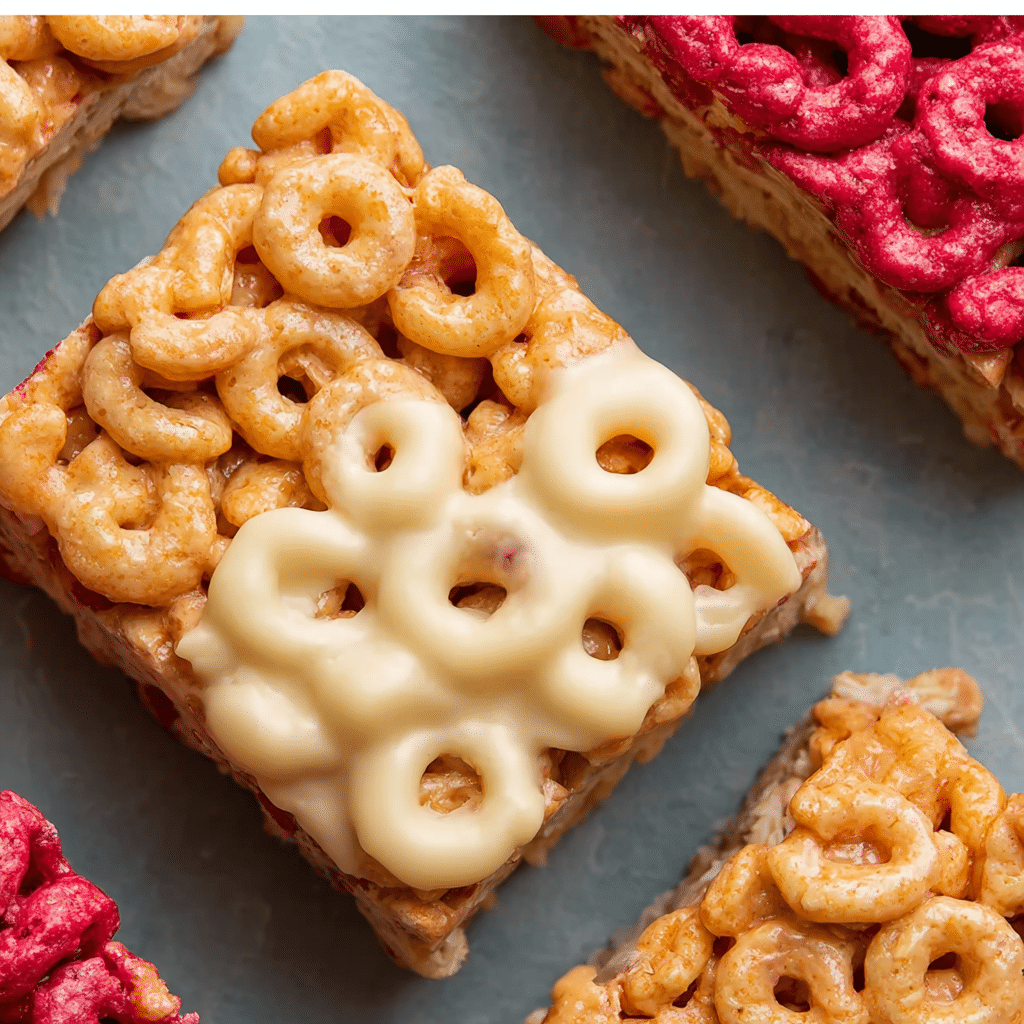
Looking for a quick, healthy snack or breakfast you can grab on the go? These homemade cereal bars are a perfect solution. Packed with wholesome ingredients like your favorite cereal and nut butter, they are easy to make, customizable, and loved by the whole family.
Unlike store-bought bars that can be loaded with sugar and preservatives, making your own at home gives you full control over the ingredients. You can adjust sweetness, protein content, or flavors to suit your preferences. Whether you want a classic peanut butter cereal bar, a chocolate-infused treat, or a protein-packed snack, these bars are incredibly versatile.
In this article, we’ll guide you through the simple steps to make your own cereal bars, share tips for perfect texture and flavor, and answer common questions so you can enjoy them anytime.
Ingredients
For these homemade cereal bars, you will need:
- 3 cups cereal of your choice – Use any cereal you love; whole-grain cereals work great for added fiber.
- 2/3 cup peanut butter or any nut butter – Peanut butter, almond butter, or cashew butter all work well.
- 1/2 cup agave, honey, or brown rice syrup – Acts as a natural sweetener and binder.
- Optional 1/2 tsp salt – Enhances the flavors of the bars.
- Optional 3 tbsp protein powder – Adds extra protein for a more filling snack.
Tip: You can also add mix-ins like mini chocolate chips, dried fruits, or seeds for extra flavor and texture.
Preparation Method
Step 1: Prepare the Pan
Line an 8-inch pan with wax paper or parchment paper. For a larger batch, you can double the recipe and use a 9×13-inch pan. This ensures the bars don’t stick and makes it easy to lift them out after freezing.
Step 2: Warm the Nut Butter
If your nut butter is stiff, gently warm it in the microwave for 15–30 seconds until it becomes easily stirrable.
Step 3: Combine Ingredients
In a large mixing bowl, combine the cereal, nut butter, sweetener (agave, honey, or syrup), optional salt, and protein powder if using. Mix well until all ingredients are fully combined and the cereal is coated evenly.
Step 4: Press Into the Pan
Pour the cereal mixture into the prepared pan. Place a second sheet of parchment paper over the top and press down very firmly. Pressing firmly is key to ensuring the bars hold together after slicing.
Step 5: Freeze Until Firm
Place the pan in the freezer for at least 30 minutes or until firm enough to cut into bars. You can also chill them in the refrigerator, but freezing ensures they hold their shape perfectly.
Step 6: Slice and Serve
Once firm, remove the top parchment and lift the block of cereal mixture out of the pan. Slice into bars of your preferred size and shape.
Step 7: Store Properly
Store leftovers in an airtight container. You can keep them in the refrigerator, freezer, or in a cool, dry place, depending on your preference.
Tips for Perfect Cereal Bars
- Press firmly – Pressing down the mixture firmly prevents the bars from crumbling.
- Use sticky sweeteners – Honey, agave, or brown rice syrup act as glue to hold the bars together.
- Experiment with cereals – Try puffed rice, granola, oats, or even a mix for texture.
- Add extras – Mix in chocolate chips, dried fruits, or seeds for extra flavor and nutrition.
- Customize protein – Add protein powder for a more filling, post-workout snack.
- Cut with a warm knife – Running a knife under hot water before slicing helps prevent crumbling.
Why This Recipe Works
These cereal bars are successful for several reasons:
- Quick and simple – Only a few ingredients and 5–10 minutes of prep.
- Customizable – Adapt to your dietary needs and flavor preferences.
- Healthy and wholesome – You control the ingredients, avoiding preservatives and excess sugar.
- Kid-friendly – Easy to make and loved by children and adults alike.
- Portable – Perfect for breakfast on the go, school snacks, or office treats.

Homemade Cereal Bars: Quick, Healthy, and Delicious
- Total Time: 5 minutes
- Yield: 8–10 bars
- Diet: Vegetarian
Description
These homemade cereal bars are a quick, healthy, and customizable breakfast or snack that the whole family will enjoy.
Ingredients
- 3 cups cereal of choice
- 2/3 cup peanut butter or nut butter of choice
- 1/2 cup agave, honey, or brown rice syrup
- ½ tsp salt (optional)
- 3 tbsp protein powder (optional)
Instructions
- Line an 8-inch pan with wax or parchment paper (or double the recipe for a 9×13-inch pan).
- Gently warm nut butter if needed to make it stirrable.
- In a large bowl, mix all ingredients until combined.
- Pour mixture into the prepared pan. Place a second sheet of parchment on top and press firmly.
- Freeze for 30 minutes or until firm enough to cut into bars.
- Store leftovers in the refrigerator, freezer, or a cool, dry place.
Notes
- Pressing firmly is key to preventing the bars from falling apart.
- Flavor variations: add chocolate chips, dried fruit, or nuts.
- Can double or halve the recipe to fit your pan size.
- Prep Time: 5 minutes
- Cook Time: 0 minutes
- Category: Breakfast, Snack
- Method: No-Bake, Freeze
- Cuisine: American
Frequently Asked Questions
1. Can I use any cereal?
Yes! Puffed rice, granola, oats, or even chocolate cereals work well. Just ensure the cereal is dry and not too sticky.
2. Can I make these nut-free?
Absolutely! Use sunflower seed butter or soy butter instead of peanut or nut butter.
3. Can I use maple syrup instead of honey or agave?
Yes, maple syrup works perfectly as a natural sweetener and binder.
4. How long do cereal bars last?
They last up to a week in the refrigerator, 1–2 months in the freezer, or a few days at room temperature in a cool, dry place.
5. Can I add chocolate chips?
Yes! Add mini chocolate chips to the mixture or sprinkle on top before pressing into the pan.
6. How do I prevent bars from falling apart?
Press the mixture very firmly into the pan and freeze or refrigerate until firm before cutting. Using sticky sweeteners also helps hold everything together.
Conclusion
These homemade cereal bars are a quick, versatile, and healthy snack or breakfast option. With just a few simple ingredients, you can create a delicious, portable, and customizable treat for yourself or your family.
Whether you make them plain, add protein powder, mix in chocolate chips, or experiment with different cereals, these bars are always a hit. They are perfect for busy mornings, after-school snacks, or a post-workout boost.
Making your own cereal bars is not only fun but also allows you to control ingredients and flavors, giving you a healthy alternative to store-bought options. Press firmly, freeze, slice, and enjoy your homemade bars anytime!