
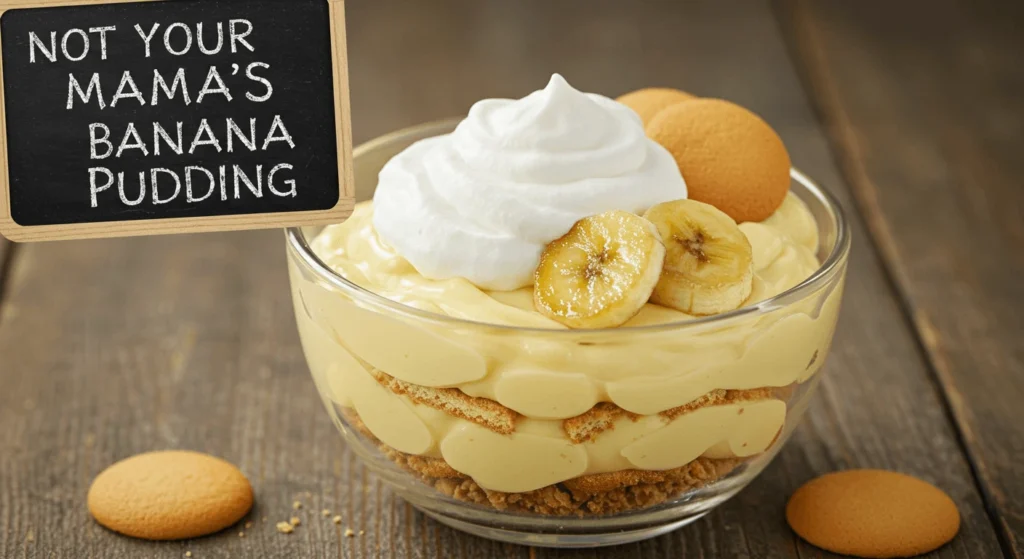
When it comes to desserts that truly steal the show, Not Your Mama’s Banana Pudding is in a league of its own. This creamy, dreamy creation takes the classic Southern favorite to a whole new level with a few modern upgrades. Perfectly layered with sweet bananas, velvety pudding, and crunchy vanilla wafers, it’s the ultimate no-bake treat for any occasion.
Whether you’re hosting a family gathering, celebrating the holidays, or simply indulging in a sweet craving, this recipe for Not Your Mama’s Banana Pudding will quickly become your go-to dessert. It’s not just delicious—it’s the best banana pudding recipe you’ll ever try, and it’s surprisingly easy to make.
Ready to discover how to create this unforgettable dessert? Let’s dive in!
What Makes Not Your Mama’s Banana Pudding Special?
Overview of Ingredients
1. Vanilla Wafers
These crispy, slightly sweet cookies are the foundation of the dessert. They soften beautifully as the pudding chills, creating a cake-like texture that pairs perfectly with the creamy layers.
2. Bananas
Fresh, ripe bananas add natural sweetness and a tropical flavor that complements the pudding and wafers. Their soft texture enhances the dessert’s smooth consistency.
3. Instant Vanilla Pudding Mix
This time-saving ingredient provides a creamy, custard-like base without the hassle of cooking from scratch. It’s quick, convenient, and just as delicious.
4. Cream Cheese
Softened cream cheese adds a rich, tangy flavor and a luxurious texture to the pudding, elevating it beyond a traditional recipe.
5. Sweetened Condensed Milk
This ingredient brings a velvety sweetness that ties the flavors together, making the dessert indulgent and satisfying.
6. Whipped Topping
A layer of fluffy whipped topping (like Cool Whip) adds a light and airy contrast to the pudding’s creaminess, making every bite irresistibly smooth.
With just a few key ingredients, this recipe transforms into a show-stopping dessert that’s as easy to make as it is to enjoy!
Texture and Flavor
1. Creamy and Velvety
The combination of cream cheese, sweetened condensed milk, and whipped topping creates a smooth and luxurious texture that melts in your mouth. Every spoonful feels indulgent and satisfying.
2. Balanced Layers
Each layer offers a unique texture: the crispy vanilla wafers soften to a cake-like consistency, while the bananas remain tender and fresh, adding a slight bite to the creamy pudding.
3. Sweet and Tangy
The natural sweetness of the bananas and wafers blends seamlessly with the tanginess of the cream cheese and the sweetness of the condensed milk. This balance ensures the dessert is rich without being overly sweet.
4. Light and Airy Finish
The whipped topping adds a light, fluffy element that prevents the dessert from feeling too heavy, making it a delightful treat for any occasion.
This harmonious blend of textures and flavors is what sets Not Your Mama’s Banana Pudding apart, making it a crowd-pleasing dessert everyone loves!
Comparison to Traditional Recipes
1. Use of Instant Pudding vs. Homemade Custard
Traditional banana pudding recipes often call for a homemade custard, which requires cooking and constant stirring. In contrast, Not Your Mama’s Banana Pudding simplifies the process by using instant vanilla pudding mix. This saves time without sacrificing the creamy, rich texture that makes banana pudding so delicious.
2. Cream Cheese and Sweetened Condensed Milk
Classic banana pudding recipes typically rely on just vanilla pudding, milk, and eggs for the base. This modern version incorporates cream cheese and sweetened condensed milk, which add depth, richness, and a slight tang that elevates the flavor profile. The result is a more indulgent and creamy dessert.
3. Whipped Topping for Lightness
While traditional banana pudding often uses meringue or simply layers of pudding, Not Your Mama’s Banana Pudding includes a layer of whipped topping. This not only lightens the dessert but also gives it a smooth, airy texture that contrasts beautifully with the denser layers of bananas and pudding.
4. No-Bake Convenience
Traditional banana pudding requires time to cook the custard and may need additional steps like baking the meringue. This version is a no-bake treat, making it incredibly convenient to prepare. You simply layer the ingredients and refrigerate for a few hours, allowing the flavors to meld together effortlessly.
In summary, while traditional banana pudding is a beloved dessert, Not Your Mama’s Banana Pudding offers a quicker, richer, and more decadent alternative, perfect for modern-day dessert lovers.
Ingredients You’ll Need
Core Ingredients
1. Vanilla Wafers
The iconic, crunchy base of banana pudding. These cookies soften as they absorb the pudding’s moisture, creating a cake-like texture that complements the creamy layers. They add a subtle sweetness and a perfect crunch to every bite.
2. Bananas
Fresh, ripe bananas are essential for the sweet, natural flavor that makes banana pudding so beloved. Their smooth texture, when layered into the dessert, contrasts beautifully with the creamy pudding and adds a refreshing burst of fruitiness.
3. Instant Vanilla Pudding Mix
A quick and easy way to achieve a creamy, custard-like consistency. Instant vanilla pudding provides the foundation for the pudding layers without the need for cooking, making this a no-fuss dessert that’s rich and satisfying.
4. Cream Cheese
Softened cream cheese adds a tangy richness that enhances the flavor profile of the dessert. It provides a smooth, creamy base for the pudding and balances the sweetness from the other ingredients, creating a more sophisticated taste.
5. Sweetened Condensed Milk
This thick, rich ingredient is what gives the pudding its velvety texture and extra sweetness. The condensed milk adds a luxurious, creamy consistency that elevates the entire dessert.
6. Whipped Topping
A key ingredient that adds lightness and fluffiness to the pudding. Whipped topping (like Cool Whip) is folded into the cream cheese and condensed milk mixture, making the dessert airy and smooth, and adding a touch of indulgence to the final layers.
These core ingredients come together to create the rich, creamy, and perfectly balanced layers that make Not Your Mama’s Banana Pudding so irresistible!
Optional Add-Ons
1. Caramel Drizzle
For a rich, sweet contrast to the creamy banana pudding, drizzle some caramel sauce on top before serving. The caramel adds depth and a subtle warmth that complements the pudding’s cool, creamy texture.
2. Crushed Cookies or Nuts
To introduce a different crunch and texture, top the pudding with crushed graham crackers, chocolate cookies, or even chopped pecans or walnuts. These add extra flavor and create a delightful contrast to the smooth layers.
3. Chocolate Shavings or Chips
If you’re a chocolate lover, sprinkle chocolate shavings or chocolate chips over the top for a delicious contrast to the vanilla pudding. This adds richness and visual appeal, creating a more decadent dessert.
4. Cinnamon or Nutmeg
For a hint of warmth, sprinkle a little cinnamon or nutmeg over the top of the dessert before serving. These spices enhance the flavor profile and give the pudding a cozy, comforting finish.
5. Fresh Berries
Add a burst of color and freshness with some fresh berries like strawberries, blueberries, or raspberries. These add a slightly tart flavor that contrasts nicely with the sweetness of the pudding.
6. Toasted Coconut
For a tropical twist, try topping the pudding with some toasted coconut flakes. This adds both flavor and texture, making the dessert even more indulgent and unique.
These optional add-ons allow you to personalize your Not Your Mama’s Banana Pudding and make it even more special, whether you’re looking to add flavor, texture, or a visual appeal!
Tips for Choosing Ingredients
1. Select Ripe, But Not Overripe Bananas
For the best flavor and texture, choose bananas that are ripe but not overly ripe. Look for bananas that are yellow with a few brown spots—this ensures they are sweet enough without being too mushy, which could affect the overall texture of the pudding.
2. Opt for Quality Vanilla Wafers
When it comes to vanilla wafers, the brand matters. Nilla Wafers are a popular choice due to their light, crispy texture and subtle vanilla flavor, but feel free to experiment with other brands or even try organic or gluten-free options if needed. The quality of these cookies will significantly impact the texture of the dessert.
3. Use Full-Fat Cream Cheese for Richness
For a smooth, creamy base, full-fat cream cheese is your best bet. It will give your pudding a richer, tangier flavor compared to reduced-fat or light versions. Make sure the cream cheese is softened before mixing to ensure a smooth texture.
4. Choose a High-Quality Instant Pudding Mix
Not all instant pudding mixes are created equal. Go for a premium vanilla pudding mix for the best flavor. Some brands have more natural ingredients and will result in a smoother, richer pudding.
5. Sweetened Condensed Milk
For the creamiest and sweetest texture, stick with regular sweetened condensed milk. While fat-free or sugar-free versions may be available, they won’t provide the same richness and smoothness that make this dessert so indulgent.
Step-by-Step Guide to Making Not Your Mama’s Banana Pudding
Prepare the Pudding
1. Mix the Instant Pudding
Start by emptying the instant vanilla pudding mix into a large mixing bowl. Add the required amount of cold milk (usually 2 cups, but check the package instructions). Whisk the mixture vigorously for about 2 minutes, or until it thickens to a smooth consistency. Be sure to scrape the edges of the bowl to ensure all of the pudding mix is fully dissolved.
2. Let the Pudding Set
After mixing, set the pudding aside for 5 minutes to allow it to fully thicken and set. This gives the pudding its creamy texture and ensures that it will hold its shape when layered in the dessert.
3. Adjust Thickness if Needed
If the pudding appears too thick, you can add a small amount of milk, one tablespoon at a time, until it reaches your desired consistency. Be cautious not to make it too runny, as the pudding needs to hold up against the layers of bananas and wafers.
This step sets the foundation for the creamy layers of your Not Your Mama’s Banana Pudding and ensures that the pudding has the perfect texture when assembled!
Make the Creamy Layer
1. Beat the Cream Cheese
Start by softening cream cheese to room temperature. Using a hand mixer or stand mixer, beat the cream cheese in a large bowl until it’s smooth and free of lumps. This will create a creamy base for the next layer.
2. Add Sweetened Condensed Milk
Slowly add the sweetened condensed milk to the softened cream cheese. Mix until the two ingredients are fully combined and the mixture is smooth. The sweetened condensed milk adds richness and sweetness to balance the tanginess of the cream cheese.
3. Fold in Whipped Topping
Next, fold in the whipped topping (such as Cool Whip) gently. This lightens the creamy mixture and gives it the airy texture that’s characteristic of Not Your Mama’s Banana Pudding. Use a spatula to fold, ensuring you don’t deflate the whipped topping. The mixture should be thick, smooth, and airy.
4. Combine with Pudding
Once the cream cheese, sweetened condensed milk, and whipped topping are well combined, gently fold this creamy mixture into the prepared instant vanilla pudding. Stir slowly until everything is well incorporated and the mixture is smooth and creamy. This step combines the richness of the cream cheese and the smoothness of the pudding into one velvety layer.
This creamy layer adds the perfect indulgence to the dessert, making it smooth, rich, and utterly delicious!
Mama’s Banana Pudding
Layer the Dessert(Mama’s Banana Pudding)
1. Start with a Layer of Vanilla Wafers
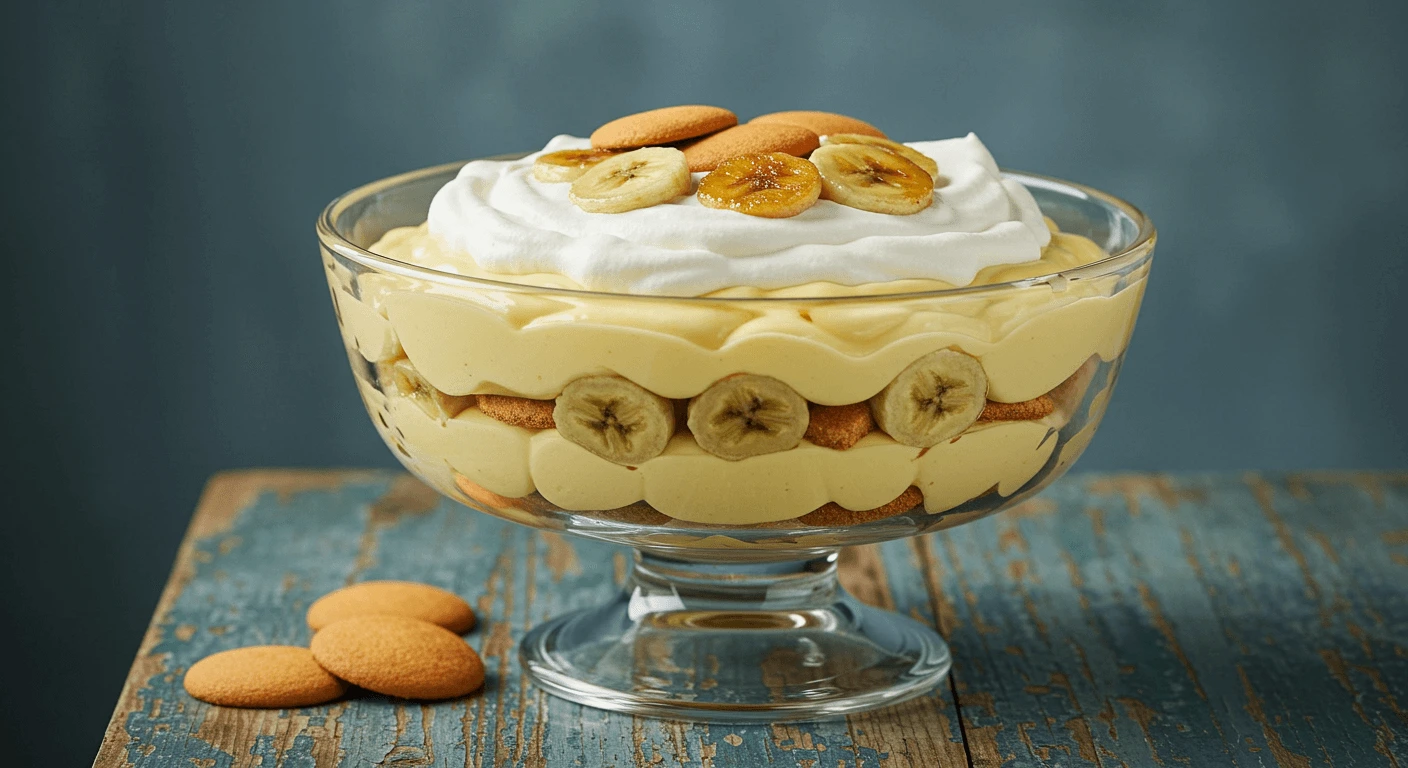
Begin by placing a layer of vanilla wafers at the bottom of a large trifle dish or a 9×13-inch baking dish. Arrange them in a single layer, making sure they cover the entire base. This will create a crunchy foundation for your dessert.
2. Add a Layer of Sliced Bananas
Once the wafers are in place, layer sliced bananas on top. Arrange them evenly, making sure the bananas cover most of the surface area. The fresh bananas add natural sweetness and a nice contrast to the creamy layers.
3. Spoon the Creamy Mixture Over
Next, spoon a generous layer of the creamy mixture (made from the pudding, cream cheese, sweetened condensed milk, and whipped topping) over the bananas. Spread it out evenly with a spatula to fully cover the bananas and wafers. This layer should be smooth and thick, enveloping the fruit and cookies.
4. Repeat the Layers
Repeat the process by adding another layer of vanilla wafers, followed by sliced bananas and then the creamy mixture. Continue layering until you’ve used up all of your ingredients, finishing with the creamy mixture on top. Make sure the top layer is smooth and level for an elegant finish.
5. Smooth and Set
After layering, smooth the top layer with a spatula to ensure it’s evenly distributed. Cover the dish with plastic wrap or a lid and refrigerate for at least 4 hours or overnight. This will allow the flavors to meld together, and the dessert will firm up to perfection.
Layering is where the magic happens in Not Your Mama’s Banana Pudding, creating the delicious contrast of textures and flavors that make this dessert so irresistible!
Chill and Serve
1. Chill the Dessert
Once your dessert is fully layered, cover the dish with plastic wrap or a lid and place it in the refrigerator. Chill for at least 4 hours, or overnight if possible. Chilling allows the pudding to set properly, giving it the perfect consistency. It also lets the flavors blend together, making the dessert even more delicious.
2. Garnish Before Serving
Before serving, you can add optional garnishes to elevate the look and flavor of your Not Your Mama’s Banana Pudding. Consider topping it with a light sprinkle of cinnamon, a drizzle of caramel sauce, or a handful of crushed vanilla wafers. Fresh berries or chocolate shavings can add a colorful touch as well.
3. Serve and Enjoy
Once chilled, take the pudding out of the refrigerator. Scoop out generous portions and serve on individual plates. The dessert should have firm layers but remain creamy and indulgent. Enjoy the combination of crispy wafers, sweet bananas, and velvety pudding!
This final step ensures that your Not Your Mama’s Banana Pudding is chilled to perfection and ready to be enjoyed by everyone!
Tips for the Best Mama’s Banana Pudding Every Time
Make It Ahead
1. Perfect for Meal Prep
Not Your Mama’s Banana Pudding is an ideal dessert to make ahead, as it actually improves in flavor after sitting for a few hours or overnight. The vanilla wafers absorb the pudding and banana juices, softening into a cake-like texture, and the layers meld together beautifully.
2. Prep in Advance
You can prepare the entire dessert up to 1-2 days before serving. Simply follow the layering steps and refrigerate the pudding until you’re ready to serve. This not only saves time on the day of your event but also allows the flavors to intensify, making it even more delicious.
3. Store Properly
To keep the dessert fresh, cover the dish tightly with plastic wrap or a lid. If making the pudding more than a day in advance, ensure that the dessert stays well-covered to prevent it from absorbing any fridge odors.
4. Optional Garnishes
If you plan to make the dessert ahead of time, wait until just before serving to add any garnishes, such as fresh bananas, crushed cookies, or a drizzle of caramel. This will keep everything looking fresh and prevent the bananas from browning.
Making it ahead allows you to spend less time preparing the dessert and more time enjoying the company of your guests! Plus, the longer it sits, the better it tastes!
Storage Advice
1. Refrigeration
Store Not Your Mama’s Banana Pudding in the refrigerator to keep it fresh. Always cover the dish with plastic wrap or a lid to prevent the pudding from absorbing any odors from other foods in the fridge. Refrigerate it for up to 3-4 days for the best flavor and texture.
2. Freezing Not Recommended
While it’s tempting to make a large batch and freeze the leftovers, it’s not recommended to freeze Not Your Mama’s Banana Pudding. Freezing can cause the cream cheese and whipped topping to separate and affect the texture of the pudding. The bananas may also become mushy and change in flavor when frozen and thawed.
3. How to Store Leftovers
After serving, store any leftover pudding in an airtight container to preserve its freshness. Be sure to refrigerate the dessert right after serving to prevent it from sitting at room temperature for too long.
4. Fresh Bananas
If you have leftover pudding but the bananas are already in the dessert, the bananas will soften and may brown a bit over time. If you plan to store the pudding for longer periods, consider adding fresh banana slices just before serving to keep the bananas looking fresh.
By following these storage tips, you can enjoy Not Your Mama’s Banana Pudding recipe for several days while maintaining its creamy texture and delicious flavor!
Customizations
1. Banana Alternatives
While bananas are a classic in this recipe, you can customize the fruit to fit different tastes. For a twist, try adding strawberries, blueberries, or even mango slices for a tropical flair. Keep in mind that the texture and flavor will change, but it will still be delicious.
2. Dairy-Free Option
To make this dessert dairy-free, you can substitute dairy-free cream cheese, coconut milk or almond milk for the regular milk, and opt for a dairy-free whipped topping. Make sure to choose a dairy-free pudding mix, as some varieties contain milk-based ingredients.
3. Gluten-Free Version
For those who need a gluten-free dessert, swap the regular vanilla wafers for gluten-free wafers or cookies. Many stores carry gluten-free versions of vanilla cookies that will work just as well in this recipe without sacrificing taste or texture.
4. Add a Crunch with Nuts
To add some extra texture, you can customize the pudding with chopped nuts, like pecans, walnuts, or almonds. Add them on top or in between the layers for a delightful crunch that contrasts with the creamy pudding and soft bananas.
5. Flavor Variations
Experiment with flavors by adding vanilla extract or almond extract to the creamy layer for an extra depth of flavor. You could also mix in cocoa powder or chocolate chips for a chocolate version of this dessert.
6. Make it Boozy
For an adult twist, you can add a splash of rum or bourbon to the pudding mixture. A tablespoon or two will add a rich, flavorful kick to your banana pudding without overpowering the original flavor.
Customizing your Not Your Mama’s Banana Pudding allows you to make it your own and cater to dietary preferences, taste changes, or even seasonal ingredients! Have fun experimenting with these variations!
Why You’ll Love This Recipe

Perfect for Any Occasion(Mama’s Banana Pudding)
1. Family Gatherings
Not Your Mama’s Banana Pudding is the perfect dessert for any family gathering. Its creamy, comforting layers are sure to please both kids and adults alike. Whether it’s a casual dinner or a holiday feast, this dessert is an easy crowd-pleaser that brings smiles to everyone’s faces.
2. Holidays and Special Events
This dessert is ideal for Thanksgiving, Christmas, or even Easter—any holiday where you want a dish that’s both indulgent and crowd-pleasing. It’s simple to make, requires no baking, and can be prepared ahead of time, making it the perfect hassle-free option for busy holiday meals.
3. Potlucks and Picnics
Take Not Your Mama’s Banana Pudding to your next potluck or picnic for a sweet treat everyone will love. Since it holds up well in the fridge and is easy to transport, it’s a great choice for events where you need a dessert that’s both delicious and easy to share.
4. Birthday Parties
This pudding is also fantastic for birthday parties, especially when served in large bowls or individual cups. It’s fun, flavorful, and a hit at any celebration, from casual get-togethers to more formal parties. Add sprinkles or colored whipped topping for a festive touch!
5. Casual Treats and Comfort Food
If you’re simply craving something sweet and comforting, Not Your Mama’s Banana Pudding is the perfect go-to dessert. It’s a great way to treat yourself after a long week or enjoy something sweet without any special occasion required.
This dessert is versatile enough to be enjoyed at any time—whether it’s a special occasion or just an everyday treat, Not Your Mama’s Banana Pudding makes every moment a little sweeter!
Crowd-Pleasing Dessert(Mama’s Banana Pudding)
1. Easy to Make for Large Groups
One of the best things about Not Your Mama’s Banana Pudding is how easy it is to make in large quantities. Whether you’re serving a small family or a big crowd, you can easily adjust the recipe to fit your needs. Simply double the ingredients and use a bigger dish to create a dessert that’s perfect for any gathering.
2. No-Bake Convenience
Since Not Your Mama’s Banana Pudding requires no baking, it’s a simple, stress-free option when you need to prepare a dessert quickly. You won’t have to worry about the oven or timing—just layer the ingredients, refrigerate, and you’re good to go!
3. A Dessert for All Ages
The sweetness of ripe bananas, the creamy layers, and the crispy vanilla wafers make this dessert a hit for guests of all ages. From toddlers to grandparents, everyone loves a big scoop of this indulgent treat.
4. Customizable for Dietary Preferences
If you have guests with dietary restrictions, you can easily customize the recipe to meet their needs. Make it dairy-free, gluten-free, or even add different fruits or flavors to make it suitable for different tastes and dietary choices.
5. Stunning Presentation
With its beautiful layers, Not Your Mama’s Banana Pudding also makes a visually appealing dessert. The contrast of the creamy layers with the banana slices and the crispy cookies creates a beautiful presentation. If you’re serving it in a trifle dish, it looks even more impressive!
Whether you’re hosting a family reunion, office party, or a holiday feast, this dessert is guaranteed to satisfy a crowd. It’s simple, versatile, and always a winner!
No-Bake Simplicity
1. Quick and Easy to Prepare
One of the biggest advantages of Not Your Mama’s Banana Pudding is its no-bake nature. You don’t need to worry about turning on the oven or managing complex cooking techniques. Simply layer the ingredients—vanilla wafers, bananas, and the creamy pudding mixture—and refrigerate. It’s an effortless way to create a delicious dessert without spending hours in the kitchen.
2. Perfect for Hot Weather
Since this is a no-bake recipe, it’s especially great for warmer months when you want a sweet treat without heating up the kitchen. Perfect for summer barbecues or any time you want a cool, refreshing dessert, this pudding keeps things simple and light.
3. Ideal for Beginners
Even if you’re not an experienced baker, Not Your Mama’s Banana Pudding is an excellent dessert to start with. The recipe doesn’t require precise baking skills or ingredients, making it a perfect option for beginners looking to impress without a lot of effort.
4. Minimal Equipment Required
All you need is a mixing bowl, a spoon for layering, and a refrigerator. No need for baking sheets, mixers, or complicated gadgets. This makes it a great option for those who want to whip up something quick and delicious with minimal clean-up.
5. Make-Ahead Convenience
The fact that it’s no-bake also means you can prepare the dessert well ahead of time. In fact, Not Your Mama’s Banana Pudding tastes even better after it has had time to chill in the fridge, allowing the flavors to develop and meld together. This makes it a perfect option for parties, gatherings, or any event where you need to prepare in advance.
With its no-bake simplicity, Not Your Mama’s Banana Pudding is a stress-free, delicious treat that everyone will love—no oven required!
Conclusion
Not Your Mama’s Banana Pudding is a crowd-pleasing, no-bake dessert that combines the rich, creamy texture of pudding with the comforting sweetness of ripe bananas and crispy vanilla wafers. With its simple ingredients and easy preparation, it’s the perfect treat for any occasion—from family gatherings to holiday feasts. Plus, its customizable nature ensures that everyone can enjoy it, no matter their dietary preferences.
We encourage you to try this best banana pudding recipe for yourself! It’s a sure-fire way to impress your guests and create lasting memories. If you’ve tried it, we’d love to hear about your experience! Share your thoughts in the comments below and let us know how you made it your own.
For more delicious dessert ideas, be sure to check out our collection of related recipes right here on the blog. Whether you’re craving something fruity, chocolatey, or decadent, we have a treat for every taste!