Introduction
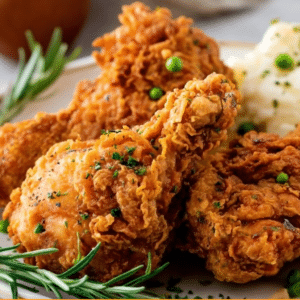
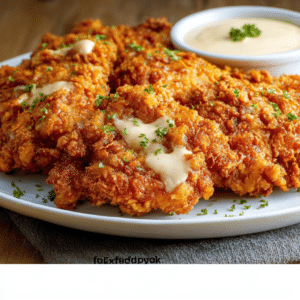
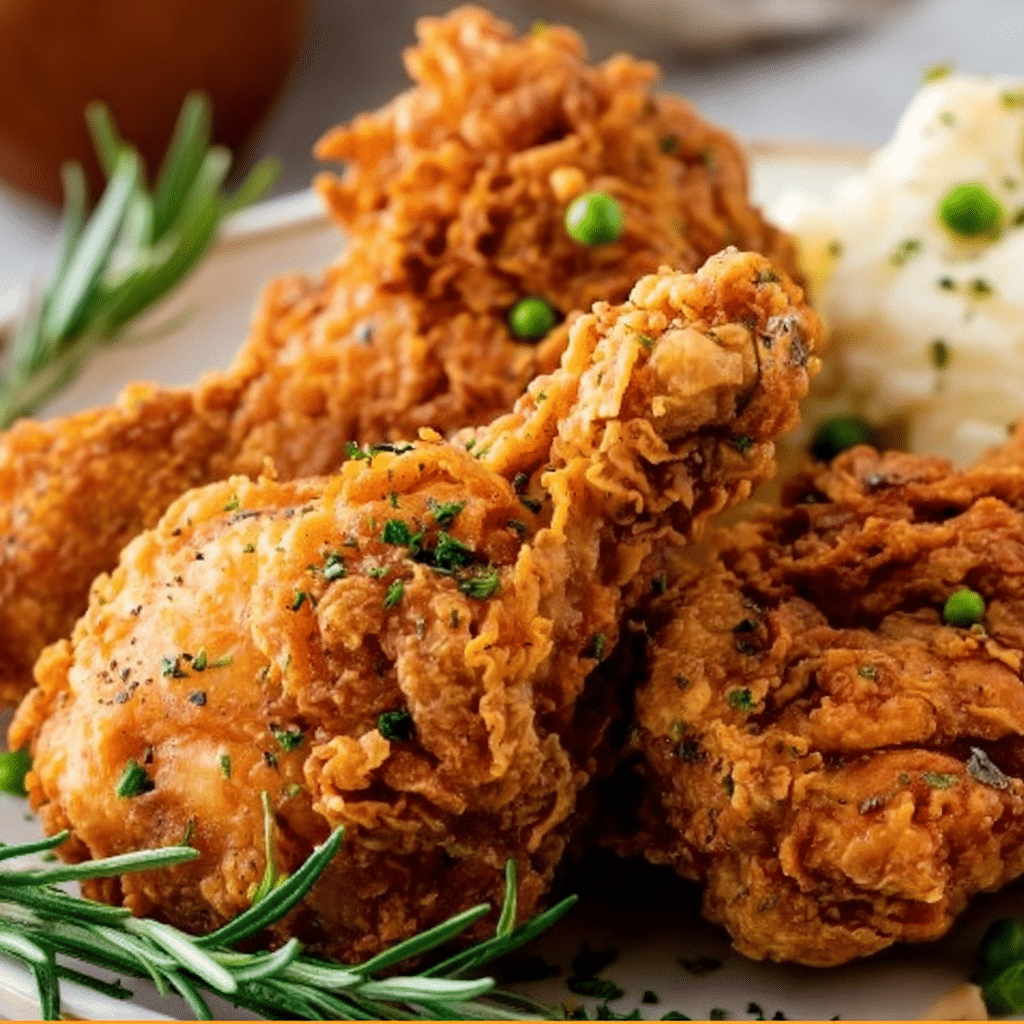
There is fried chicken, and then there is the fried chicken. The kind that makes you close your eyes after the first bite. The kind with a craggy, golden-brown crust that shatters audibly, revealing impossibly juicy, tender meat beneath. The kind that is seasoned not just on the surface but deep into every fiber, where buttermilk, garlic, paprika, thyme, basil, and a whisper of cayenne have worked their magic for hours. This is that fried chicken. This is the Best Buttermilk Fried Chicken.
Fried chicken is more than a dish—it is a cultural touchstone. From Sunday suppers in the American South to picnic baskets and bucket meals, fried chicken has earned its place as one of the world’s most beloved comfort foods. But for all its popularity, truly great fried chicken is surprisingly rare. It requires patience, technique, and a respect for the details: the long buttermilk soak, the double-layered seasoning, the precise oil temperature, and the careful dredging that creates that signature craggy crust.
This recipe leaves nothing to chance. The chicken is first seasoned with a dry rub of salt, pepper, garlic powder, dried mustard, and paprika—flavors that penetrate the meat even before the buttermilk bath. Then comes a long soak in tangy, tenderizing buttermilk, which breaks down proteins and ensures juicy, succulent chicken. The flour coating is a masterful blend of baking powder (for extra crispiness), salt, garlic powder, paprika, dried basil, dried thyme, onion powder, and cayenne pepper. The result is a crust that is deeply savory, slightly herbal, warmly spiced, and irresistibly crunchy.
The frying technique is equally important. The oil is heated to precisely 340°F—hot enough to crisp the crust without burning, cool enough to cook the chicken through without drying it out. Frying in batches prevents overcrowding, which would lower the oil temperature and result in greasy, soggy chicken. A wire rack for draining ensures that every piece stays crispy on all sides.
This is not a quick recipe. It requires planning (overnight marination is strongly recommended) and attention (monitoring oil temperature is essential). But the reward is extraordinary: fried chicken that rivals the best you have ever tasted, made in your own kitchen.
In this article, you will find a comprehensive guide to making the Best Buttermilk Fried Chicken from scratch. We will cover ingredient selection, step-by-step preparation, expert tips for achieving the perfect crust and juicy interior, storage instructions, and detailed answers to frequently asked questions.
Ingredients
Before you begin, gather all of your ingredients. Because this recipe involves multiple steps and precise timing, having everything prepped and measured is essential. Below is the complete list, organized by component.
For the Chicken and Marinade
| Ingredient | Quantity | Notes |
|---|---|---|
| Chicken pieces (bone-in, skin-on) | 8 pieces | Thighs and legs preferred; breasts and wings also work |
| Buttermilk | 2 cups | Full-fat preferred; shake before measuring |
For the First Seasoning (Applied Before Buttermilk)
| Ingredient | Quantity |
|---|---|
| Salt | 1 teaspoon |
| Ground black pepper | 1 teaspoon |
| Garlic powder | 1 teaspoon |
| Dried mustard | 1 teaspoon |
| Paprika | ½ teaspoon |
For the Flour Coating (Dry Dredge)
| Ingredient | Quantity |
|---|---|
| All-purpose flour | 2 cups |
| Baking powder | 1 tablespoon |
| Salt | 1½ teaspoons |
| Garlic powder | 1½ teaspoons |
| Paprika | 1½ teaspoons |
| Dried basil | 1½ teaspoons |
| Dried thyme | 1½ teaspoons |
| Onion powder | 1½ teaspoons |
| Cayenne pepper | 1 teaspoon |
For Frying
| Ingredient | Quantity | Notes |
|---|---|---|
| Vegetable oil | 4 cups (or more) | Enough for deep frying; canola or peanut oil also work |
Preparation Method
Step 1: Season the Chicken
Place the 8 pieces of bone-in, skin-on chicken (thighs and legs preferred) in a large bowl or a deep dish.
In a small bowl, combine the first seasoning ingredients:
- 1 teaspoon salt
- 1 teaspoon ground black pepper
- 1 teaspoon garlic powder
- 1 teaspoon dried mustard
- ½ teaspoon paprika
Sprinkle this seasoning mixture evenly over the chicken pieces. Use your hands to rub the seasoning into the chicken, ensuring every piece is well coated on all sides, including under the skin where possible.
Step 2: Add the Buttermilk
Pour 2 cups of buttermilk over the seasoned chicken. Stir or toss to combine, making sure each piece is thoroughly coated in the buttermilk mixture. The buttermilk should cover the chicken completely; if it does not, add a little more.
Step 3: Marinate
Cover the bowl with plastic wrap or a lid. Refrigerate for at least 1 hour. However, for the best results, marinate overnight (8 to 24 hours) . The longer marination allows the buttermilk to tenderize the meat and the seasonings to penetrate deeply.
Why buttermilk? The acidity in buttermilk breaks down proteins in the chicken, resulting in exceptionally tender, juicy meat. It also adds a subtle tang that complements the savory coating.
Step 4: Make the Flour Coating
While the chicken marinates (or just before frying), prepare the dry dredge. In a shallow dish (a pie plate, wide bowl, or baking dish works well), whisk together:
- 2 cups all-purpose flour
- 1 tablespoon baking powder
- 1½ teaspoons salt
- 1½ teaspoons garlic powder
- 1½ teaspoons paprika
- 1½ teaspoons dried basil
- 1½ teaspoons dried thyme
- 1½ teaspoons onion powder
- 1 teaspoon cayenne pepper
Whisk thoroughly to ensure all spices are evenly distributed throughout the flour. The baking powder is a secret weapon—it creates tiny air bubbles in the crust, making it lighter and crispier.
Step 5: Prepare the Frying Setup
Important: Do not begin frying until your oil is at the correct temperature. Frying at too low a temperature results in greasy, soggy chicken. Frying at too high a temperature burns the outside before the inside cooks.
Pour enough vegetable oil into a deep fryer, large Dutch oven, or heavy-bottomed pot to reach a depth of about 2 to 3 inches. You will need approximately 4 cups or more, depending on the size of your pot.
Heat the oil to 340°F (170°C) . Use a candy/deep-fry thermometer clipped to the side of the pot to monitor the temperature accurately. Maintaining a consistent temperature is the single most important factor for successful fried chicken.
Prepare your draining station: Place a wire rack over a baking sheet or a layer of paper towels. The wire rack is preferred because it allows air to circulate around the chicken, keeping the crust crispy on all sides.
Step 6: Dredge the Chicken
Remove the marinated chicken from the refrigerator. Working with one piece at a time:
- Lift the chicken from the buttermilk, allowing excess buttermilk to drip back into the bowl.
- Transfer the chicken to the flour mixture.
- Dredge thoroughly, pressing the flour mixture onto the chicken from all sides. For an extra-craggy crust, use one hand to sprinkle flour over the chicken while pressing it into the coating.
- Shake off excess flour and place the dredged chicken on a clean plate or wire rack.
Repeat with all pieces. Let the dredged chicken rest for 5 to 10 minutes before frying. This resting period allows the coating to adhere more firmly.
Step 7: Fry the Chicken
Check the oil temperature before adding any chicken. It should read 340°F.
Carefully place 4 to 5 pieces of chicken into the hot oil. Do not overcrowd—adding too many pieces at once will lower the oil temperature dramatically, resulting in greasy chicken. Fry in batches if necessary.
Monitor the oil temperature as the chicken fries. The temperature will drop when you add the chicken; adjust the heat as needed to maintain around 340°F. Do not let the temperature fall below 325°F or rise above 360°F.
Fry the chicken for approximately 15 minutes per piece, turning occasionally with tongs for even browning. Cooking times vary based on the size and cut of the chicken:
- Thighs and legs: 14–16 minutes
- Breasts (bone-in): 12–14 minutes
- Wings: 8–10 minutes
The chicken is ready when:
- The crust is deep golden-brown and crispy.
- An instant-read thermometer inserted into the thickest part (not touching bone) reads 170°F (77°C) for dark meat, 165°F (74°C) for white meat.
- The juices run clear when the chicken is pierced.
Step 8: Drain and Rest
Using tongs or a slotted spoon, carefully transfer the fried chicken to the wire rack (or paper towels). Do not pile the chicken—spread it in a single layer.
Let the chicken rest for 5 to 10 minutes before serving. This resting period allows the juices to redistribute and the crust to set.
Step 9: Serve
Serve the fried chicken warm. It is delicious on its own, but classic accompaniments include:
- Mashed potatoes and gravy
- Coleslaw
- Biscuits
- Pickles
- Hot honey or hot sauce
Expert Tips for the Best Buttermilk Fried Chicken
- Marinate overnight. The difference between 1 hour and 12 hours is dramatic. Overnight marination yields significantly more tender, flavorful chicken.
- Use a thermometer for the oil. Guessing the oil temperature is the number one reason homemade fried chicken fails. A candy/deep-fry thermometer is inexpensive and essential.
- Do not overcrowd the pot. Frying too many pieces at once lowers the oil temperature, causing the chicken to absorb oil rather than crisp. Fry in batches and keep finished pieces warm in a 200°F oven.
- Let the dredged chicken rest. After coating the chicken in flour, let it sit for 5–10 minutes before frying. This allows the coating to hydrate and adhere, reducing the chance of the breading falling off in the oil.
- Use bone-in, skin-on chicken. Boneless, skinless chicken will not achieve the same juicy, flavorful results. The bone helps conduct heat evenly, and the skin renders fat that contributes to the crispy crust.
- Maintain oil temperature. If the oil temperature drops below 325°F, the chicken will absorb oil and become greasy. If it rises above 360°F, the crust will burn before the inside cooks. Adjust the heat as needed between batches.
- Use a wire rack for draining. Paper towels trap steam and make the bottom of the chicken soggy. A wire rack allows air to circulate, keeping the crust crispy on all sides.
Storage and Reheating
Refrigeration: Store leftover fried chicken in an airtight container in the refrigerator for up to 3 days. The crust will soften, but the flavor remains excellent.
Freezing: Freeze cooked, cooled chicken in a single layer on a baking sheet, then transfer to a freezer-safe bag. Freeze for up to 2 months. Thaw overnight in the refrigerator before reheating.
Reheating (oven): The best method for restoring crispiness. Preheat oven to 375°F. Place chicken on a wire rack over a baking sheet and bake for 15–20 minutes until heated through and crispy.
Reheating (air fryer): Excellent for single servings. Air fry at 360°F for 6–8 minutes.
Reheating (microwave): Not recommended. The microwave will make the crust soggy and chewy.
Conclusion
The Best Buttermilk Fried Chicken is a labor of love, and every minute is worth it. From the moment you rub the first seasonings into the chicken to the final, shattering crunch of that golden-brown crust, this recipe delivers an experience that takeout and fast food simply cannot match. The buttermilk ensures juicy, tender meat. The double-layered seasoning (before the marinade and in the flour) ensures deep, complex flavor. The precise frying technique ensures a crust that is crispy, craggy, and unforgettable.
This is fried chicken to be proud of. It is the dish you bring to a potluck and watch disappear. It is the meal you make on a lazy Sunday, filling your kitchen with the aroma of garlic, thyme, and cayenne. It is the recipe you pass down to the next generation. It is, quite simply, the best.
So season that chicken, pour that buttermilk, and heat that oil. Your masterpiece awaits.
Frequently Asked Questions (FAQ)
1. Can I use boneless, skinless chicken for this recipe?
Yes, but the results will be different. Boneless, skinless chicken cooks faster (8–10 minutes) and will be less juicy. The crust will still be delicious, but you will miss the rendered fat and crispy skin that make traditional fried chicken so special. If using boneless chicken, reduce frying time and check for doneness at 165°F.
2. Can I use chicken breasts instead of thighs and legs?
Yes. Bone-in, skin-on chicken breasts work well. Fry for 12–14 minutes. Be careful not to overcook, as breasts can dry out. Use a meat thermometer to check for 165°F.
3. Can I make this recipe gluten-free?
Yes. Substitute the all-purpose flour with a gluten-free 1:1 flour blend (like King Arthur Measure for Measure or Bob’s Red Mill). Ensure your baking powder is gluten-free (most are). The texture will be slightly different but still delicious.
4. Can I use a different oil for frying?
Yes. Use oils with a high smoke point:
- Peanut oil (excellent flavor, high smoke point)
- Canola oil (neutral, affordable)
- Vegetable oil (neutral, affordable)
- Avocado oil (high smoke point, healthy)
Avoid olive oil (low smoke point) and butter (burns easily).
5. Why is my fried chicken greasy?
Greasy chicken is almost always caused by oil that is not hot enough. When the oil temperature drops below 325°F, the chicken absorbs oil instead of crisping. Solutions:
- Maintain oil at 340°F.
- Do not overcrowd the pot.
- Let the oil temperature recover between batches.
6. Why did my breading fall off?
Breading falls off for several reasons:
- Chicken was too wet (pat dry before first seasoning).
- No resting time after dredging (let coated chicken sit for 5–10 minutes).
- Oil temperature too low (breading absorbs oil and slides off).
- Overcrowding (pieces bump into each other).
7. Can I bake this chicken instead of frying?
Baking will not produce the same crispy, craggy crust. If you must bake, preheat oven to 425°F, place chicken on a wire rack over a baking sheet, spray generously with oil, and bake for 40–50 minutes, flipping halfway. The result will be closer to baked breaded chicken than fried chicken.
8. How do I know when the oil is at 340°F without a thermometer?
While a thermometer is strongly recommended, you can test with a small cube of bread or a pinch of flour. It should bubble vigorously and turn golden brown in about 60 seconds. If it browns instantly (15–20 seconds), the oil is too hot. If it sinks and barely bubbles, the oil is too cool.
9. Can I reuse the frying oil?
Yes. Let the oil cool completely. Strain it through a fine-mesh sieve or cheesecloth into a clean container to remove food particles. Store in a cool, dark place. Reuse the oil once or twice for frying similar foods. Discard the oil when it becomes dark, smells rancid, or smokes easily.
10. What is the purpose of baking powder in the flour coating?
Baking powder creates tiny air bubbles in the crust as it fries, resulting in a lighter, crispier, more delicate coating. It also helps the crust achieve that signature craggy texture. Do not substitute baking soda—the chemical reaction is different.
11. Can I use fresh herbs instead of dried?
Yes, but with adjustments. Dried herbs are more concentrated than fresh. Substitute 1½ teaspoons dried herbs with 1½ tablespoons fresh, finely chopped herbs. Add fresh herbs to the flour mixture just before dredging, as they release moisture.
12. How do I keep fried chicken warm and crispy while frying multiple batches?
Preheat your oven to 200°F (95°C) . Place a wire rack over a baking sheet. As each batch finishes frying, transfer the chicken to the rack and place it in the oven. The low heat keeps the chicken warm without continuing to cook it or softening the crust.
Print
The Best Buttermilk Fried Chicken – Crispy, Juicy, and Unforgettably Flavorful
- Total Time: 45 minutes (plus marinating)
- Yield: 4–6 servings
Description
The ultimate Buttermilk Fried Chicken with juicy, tender meat and a perfectly seasoned, crispy golden crust. Marinated in buttermilk and coated in a flavorful spice blend for classic Southern-style comfort food.
Ingredients
- 8 pieces bone-in, skin-on chicken (thighs and legs)
- 2 cups buttermilk
- 2 cups all-purpose flour
- 1½ tsp garlic powder
- 1½ tsp paprika
- 1½ tsp onion powder
- 1½ tsp salt
- 1½ tsp dried thyme
- 1½ tsp dried basil
- 1 tsp black pepper
- 1 tsp dried mustard
- 1 tsp cayenne pepper
- 1 tbsp baking powder
- ½ tsp paprika
- 4 cups vegetable oil (for frying)
Instructions
- Season chicken with salt, pepper, garlic powder, dried mustard, and paprika.
- Pour buttermilk over chicken and mix until fully coated.
- Cover and refrigerate at least 1 hour or overnight for best flavor.
- In a bowl, mix flour, baking powder, and all remaining spices.
- Heat oil in a deep pot to 340°F (170°C).
- Dredge chicken in flour mixture, coating well.
- Fry in batches 15 minutes, turning occasionally until golden and cooked through (170°F internal temp).
- Drain on a wire rack to keep crispy.
Notes
- Marinate overnight for maximum tenderness.
- Keep oil temperature steady for best results.
- Prep Time: 15 minutes
- Cook Time: 30 minutes
- Category: Main Dish
- Method: Fried
- Cuisine: Southern American