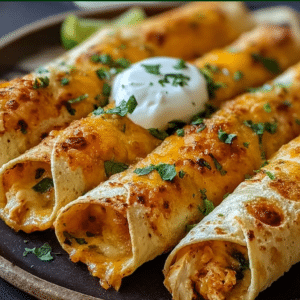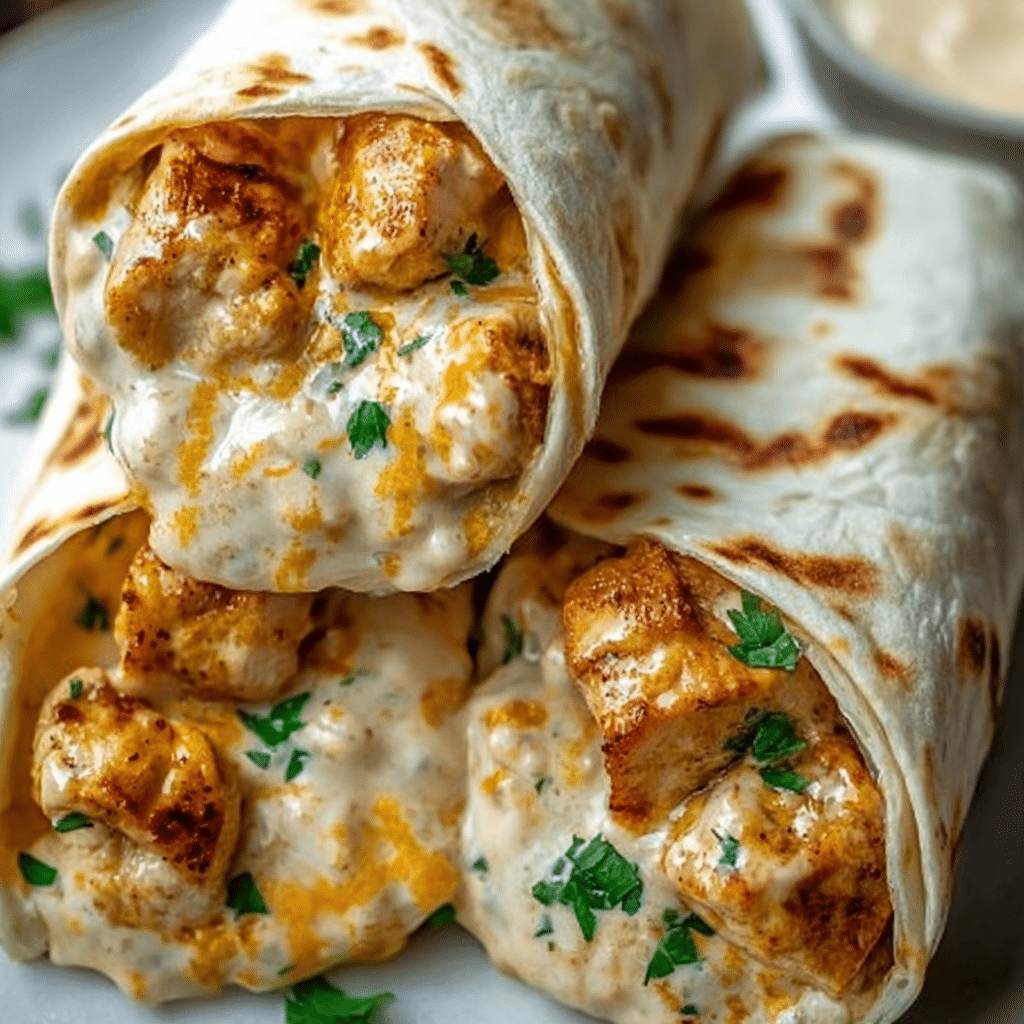
The chicken wrap is a cornerstone of modern casual dining, offering a portable and versatile canvas for a variety of flavor profiles. Among these, the Cheesy Garlic Chicken Wrap stands out as a masterclass in minimalist culinary excellence. By focusing on a few high-quality components—tender shredded poultry, a rich garlic-infused emulsion, and sharp melted cheese—you create a dish that is both deeply comforting and sophisticated in its balance. The secret to a professional-grade wrap lies not just in the ingredients, but in the “press and toast” technique, which transforms a soft tortilla into a crisp, golden vessel that seals in the savory fillings.
In this comprehensive guide, we will explore the technical nuances of the perfect wrap, from the science of the garlic aioli binder to the importance of the Maillard reaction during the grilling phase. Whether you are looking for an elevated lunch option or a quick, high-protein dinner, these instructions will help you achieve a result that rivals the best deli-style offerings. We will break down the preparation into manageable steps, ensuring that every wrap you serve is structurally sound and bursting with flavor.
The Flavor Architecture: Why This Recipe Works
A professional wrap is more than just ingredients inside a tortilla; it is a balance of fat, salt, and texture. To understand the success of this specific recipe, we must look at the three pillars of its construction:
The Creamy Binder: Garlic Aioli
Unlike a standard mayonnaise, garlic aioli provides a pungent, aromatic punch that cuts through the richness of the chicken. Aioli is traditionally an emulsion of garlic and oil, and when combined with cooked chicken, it ensures the meat remains succulent during the reheating and grilling process. It acts as a protective barrier, preventing the chicken from becoming dry or stringy when exposed to heat.
The Structural Seal: Melted Cheddar
Cheddar cheese serves two purposes in this wrap. First, it provides a sharp, salty contrast to the mellow garlic. Second, it acts as the “glue.” As the cheese melts in the skillet, it fuses the shredded chicken to the inner walls of the tortilla, ensuring the wrap doesn’t fall apart when sliced or bitten. This is essential for a “clean” eating experience.
The Crisp Exterior: The Toasted Tortilla
A raw tortilla can often feel gummy or doughy. By grilling the assembled wrap in a skillet, we trigger the Maillard reaction—a chemical reaction between amino acids and reducing sugars that gives browned food its distinctive flavor. This toast not only adds a necessary crunch but also deepens the overall flavor profile of the wheat.
Essential Ingredients and Preparation
To achieve a professional result, the quality of your primary ingredients is paramount. Using fresh, well-seasoned chicken and a high-quality aioli will make a noticeable difference in the final product.
- 2 Cups Cooked Shredded Chicken: For the best texture, use a mix of white and dark meat. Rotisserie chicken is an excellent choice for its tenderness and pre-seasoned flavor. Ensure the shreds are bite-sized to allow for even distribution.
- 1/2 Cup Garlic Aioli: You can use a store-bought gourmet aioli or make a quick version by whisking minced fresh garlic and a splash of lemon juice into high-quality mayonnaise.
- 1 Cup Shredded Cheddar Cheese: Sharp or extra-sharp cheddar is recommended to ensure the cheese flavor isn’t lost among the garlic. Shredding the cheese yourself from a block will result in a better melt than pre-shredded varieties.
- 4 Large Tortillas: Use “burrito-size” flour tortillas. They are more pliable than corn or whole wheat varieties, which is crucial for achieving a tight, professional fold.
- Salt and Pepper: To taste. Even if the chicken is pre-cooked, a final seasoning of the mixture ensures the flavors pop.
Technical Step-by-Step Instructions
Creating the perfect wrap is a methodical process. Follow these steps to ensure a consistent, restaurant-quality finish.
Step 1: Preparing the Chicken Medley
In a large mixing bowl, combine your 2 cups of shredded chicken with the ½ cup of garlic aioli. Use a large spoon or spatula to fold the ingredients together until every shred of chicken is thoroughly coated.
At this stage, taste a small amount of the mixture. Depending on the seasoning of your original chicken, add salt and freshly ground black pepper. The goal is a savory, creamy base where the garlic is present but not overwhelming. If the mixture feels too dry, add an extra tablespoon of aioli; if it is too wet, it may leak during the grilling phase, so aim for a “thick salad” consistency.
Step 2: The Art of Assembly
Lay your four large tortillas out on a clean, flat surface. If your tortillas feel stiff, you can microwave them for 10 seconds between damp paper towels to make them more pliable.
Divide the chicken mixture evenly among the four tortillas, placing it in the center but slightly toward the bottom third. Top the chicken with ¼ cup of the shredded cheddar cheese per wrap. Leaving space at the edges is vital for the folding process.
Step 3: Folding for Structural Integrity
To fold like a pro, follow the “envelope” method:
- Fold the left and right sides of the tortilla inward toward the center, over the edges of the filling.
- While holding the sides down, take the bottom edge (the one closest to you) and fold it up and over the filling.
- Roll the wrap away from you tightly, tucking the sides in as you go, until you have a compact, sealed cylinder.
Professional Tip: Always place the finished wrap on a plate with the seam-side down. The weight of the wrap will help keep it closed until it hits the skillet.
Step 4: The Grilling and Searing Phase
Heat a large non-stick skillet over medium heat. You do not necessarily need oil or butter, as the fat in the tortilla and the filling will help with browning, but a light spray of olive oil can add extra crunch.
Place the wraps in the skillet seam-side down. This is the most important part of the cooking process; the heat will immediately begin to melt the cheese and “weld” the seam shut. Grill for 2–3 minutes per side. Use a spatula to press down gently on the wraps as they cook—this ensures even contact with the heat and a perfectly flat, toasted surface. Once the wraps are golden brown and the cheese inside has visibly melted, remove them from the heat.
Step 5: Slicing and Presentation
Let the wraps rest for about 60 seconds before slicing. This allows the melted cheese to “set” slightly, preventing the filling from spilling out. Use a sharp serrated knife to slice each wrap in half at a diagonal angle. This “bias cut” is a standard professional presentation that showcases the creamy, cheesy interior to your guests. Serve immediately while warm.
Pro Tips for Culinary Success
Infusing Extra Flavor
If you want to add a layer of complexity, consider adding a handful of fresh arugula or spinach to the wrap just before folding. The residual heat from the grilled chicken and the skillet will slightly wilt the greens, adding a peppery bite that complements the garlic beautifully.
The “Perfect Melt” Strategy
If you find that your tortilla is browning too quickly before the cheese has fully melted in the center, lower the heat and cover the skillet with a lid for 60 seconds. This traps the steam and ensures the interior reaches the perfect temperature without burning the exterior.
Choosing the Right Tortilla
While flour tortillas are the standard, you can experiment with spinach-infused or sun-dried tomato tortillas. These add a vibrant color to the plate and a subtle herbal note that pairs exceptionally well with garlic aioli.
Frequently Asked Questions
Can I make these wraps ahead of time?
You can prepare the chicken and aioli mixture up to 2 days in advance and store it in the refrigerator. However, for the best results, do not assemble or grill the wraps until you are ready to serve. If a wrap sits in the fridge after being grilled, the tortilla will lose its crunch and become chewy.
What is the best way to reheat a leftover wrap?
Avoid the microwave, as it will make the tortilla soggy and “rubbery.” The best way to reheat is in a dry skillet over low-medium heat for 3–4 minutes per side, or in an air fryer at 350°F for about 5 minutes. This will restore the crispiness of the exterior while gently warming the chicken and cheese.
Is there a healthy substitute for garlic aioli?
If you are looking for a lighter option, you can substitute the aioli with a mixture of plain Greek yogurt, minced garlic, and a teaspoon of olive oil. This provides a similar creamy texture and garlicky bite with significantly less fat and more protein.
Why did my tortilla tear while I was folding it?
Tortillas usually tear because they are too cold or too dry. Ensure you are using fresh tortillas and consider warming them slightly before assembly. Also, be careful not to overfill the wrap; a “burrito-size” tortilla can comfortably hold about ½ to ¾ cup of filling total.
Can I use a different type of cheese?
Absolutely. While cheddar provides a classic sharp flavor, Monterey Jack is an excellent substitute for a superior “cheese pull.” Provolone or Swiss cheese also work well, offering a more mellow flavor that allows the garlic aioli to be the primary star.
How do I prevent the wrap from opening in the skillet?
The secret is the seam-side down technique. By placing the seam against the hot surface of the pan first, the heat acts as a glue. If you still have trouble, you can apply a tiny dab of the aioli mixture to the edge of the tortilla before folding to act as an extra adhesive.
What side dishes go well with these wraps?
These wraps are quite rich, so they pair best with something light and acidic. A side of sweet potato fries, a crisp Caesar salad, or even a simple cucumber and tomato salad with a vinaigrette will balance the meal perfectly.
Can I add vegetables to the filling?
Yes! Roasted red peppers, sautéed onions, or even crispy bacon bits are fantastic additions. Just ensure any vegetables added are relatively dry; excess moisture from watery vegetables like raw tomatoes can make the internal part of the wrap soggy.
Conclusion
The Cheesy Garlic Chicken Wrap is a testament to the idea that simple cooking can be spectacular when executed with the right technique. By mastering the assembly and the final sear, you elevate a handful of pantry staples into a professional-quality meal. The interplay between the aromatic garlic aioli, the sharp melted cheddar, and the toasted tortilla creates a sensory experience that is far greater than the sum of its parts.
Whether you are cooking for a busy family or hosting a casual gathering, these wraps are sure to be a favorite. They are durable, flavorful, and incredibly satisfying. Remember to focus on the details—the quality of your shred, the tightness of your fold, and the golden color of your toast. With these steps, you’ll be serving up the perfect wrap every time. Enjoy your warm, cheesy, and garlicky creation!
Print
The Ultimate Guide to Professional Cheesy Garlic Chicken Wraps
- Total Time: 20 minutes
- Yield: 4 wraps
Description
Cheesy Garlic Chicken Wraps are quick, creamy, and packed with flavor—made with tender shredded chicken, garlic aioli, and melted cheddar cheese wrapped in golden grilled tortillas.
Ingredients
- 2 cups cooked chicken, shredded
- 1/2 cup garlic aioli
- 1 cup cheddar cheese, shredded
- 4 large tortillas
- Salt and pepper to taste
Instructions
- In a bowl, combine shredded chicken with garlic aioli. Season with salt and pepper.
- Place chicken mixture and shredded cheese onto each tortilla.
- Fold tortillas tightly into wraps.
- Heat a skillet over medium heat and grill wraps until golden brown and cheese is melted.
- Slice and serve warm.
Notes
- Add veggies like lettuce or tomatoes for extra freshness.
- Use rotisserie chicken for quicker prep.
- Serve with dipping sauces like ranch or garlic sauce.
- Prep Time: 10 minutes
- Cook Time: 10 minutes
- Category: Main Dish, Wraps
- Method: Grill / Stovetop
- Cuisine: American