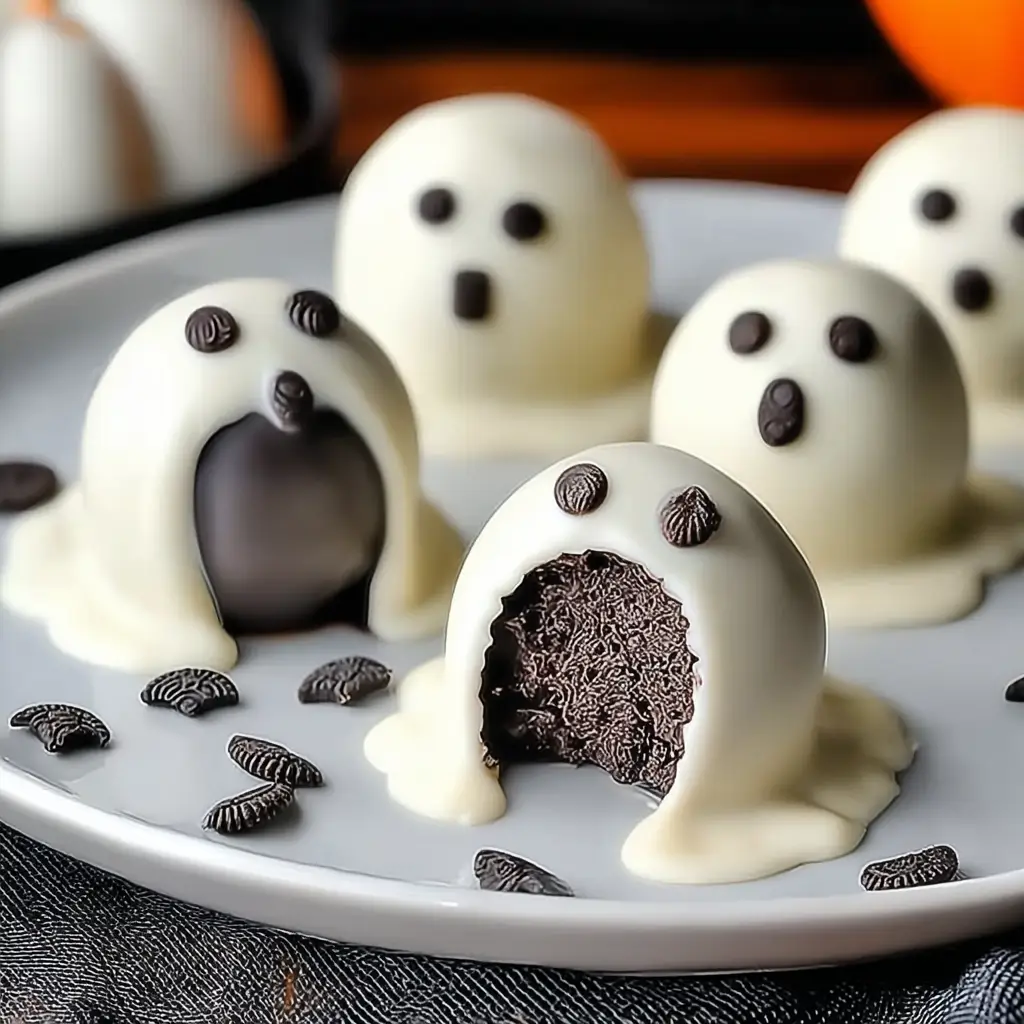
Halloween is the time of year when creativity takes center stage — from costumes to decorations, and most importantly, to food. Sweet treats become more than just desserts; they become conversation starters and party highlights. Among all the spooky delights you can make, there’s one recipe that’s both adorably festive and incredibly simple: Ghost OREO Ball Truffles.
These no-bake truffles combine crushed Oreo cookies and cream cheese into a luscious, fudgy mixture, then coat them in silky white chocolate to create cute little “ghosts.” They’re perfect for Halloween parties, dessert tables, or even as edible gifts for friends and family. What makes them even better? They require no baking, just a few ingredients, and a little creativity with decorating.
In this detailed guide, we’ll walk you through how to make these hauntingly delicious truffles from start to finish. You’ll also find expert tips, variations, and answers to common questions so your spooky creations turn out perfect every time.
Why You’ll Love Ghost OREO Ball Truffles
There are plenty of Halloween treats out there, but these truffles check every box for simplicity, flavor, and fun. Here’s why you’ll love making them:
- No Baking Required:
Skip the oven and keep things cool. These truffles are ideal for quick preparation and can be made ahead of time. - Perfect for Halloween Parties:
Their cute ghost shape makes them instantly festive, adding a playful touch to dessert tables or snack spreads. - Just a Few Ingredients:
All you need are Oreos, cream cheese, and white chocolate — plus some sprinkles or candy eyes if you want to get creative. - Rich and Creamy Flavor:
The combination of crushed cookies and cream cheese delivers that indulgent cookies-and-cream taste everyone loves. - Customizable:
You can easily switch up the chocolate coating or decorations to fit any occasion beyond Halloween. - Kid-Friendly Project:
These are fun for kids to help with — especially shaping the ghosts and adding little faces.
Ingredients You’ll Need
Let’s start with the essentials. Here’s everything you need to make a batch of 12 spooky truffles.
For the Truffle Mixture:
- 36 Oreo cookies (regular or gluten-free, if desired)
The cookies form the base of your truffles. The cream filling adds just the right sweetness and texture. - 8 oz (225 g) cream cheese (use full-fat for the best taste and consistency)
This ingredient binds the cookie crumbs into a smooth, creamy dough that’s easy to shape.
the Chocolate Coating:
- 12 oz (340 g) white chocolate
The white chocolate coating creates the ghostly look. You can also use milk or dark chocolate for a different twist.
For the Decoration:
- Sprinkles or edible candy eyes (optional)
These fun additions turn your truffles from plain white orbs into adorable ghosts.
Equipment You’ll Need
Having the right tools makes the process smooth and mess-free. Gather the following before you begin:
- Food processor or blender
- Mixing bowl
- Rubber spatula or spoon
- Parchment paper
- Microwave-safe bowl (for melting chocolate)
- Baking tray
- Forks or dipping tools (for coating)
Step-by-Step Preparation Method
Step 1 – Make the Base
Start by making the Oreo crumbs that form the base of your truffles.
- Add all 36 Oreo cookies (with the cream filling) to a food processor.
- Pulse until you achieve fine, even crumbs.
- If you don’t have a food processor, place the cookies in a resealable bag and crush them using a rolling pin.
- Transfer the crumbs into a large mixing bowl.
The finer the crumbs, the smoother your truffle texture will be.
Step 2 – Mix the Filling
- Add 8 oz of softened cream cheese to the Oreo crumbs.
Make sure the cream cheese is at room temperature — this helps it blend evenly. - Use a spatula or spoon to mix until the texture is uniform and smooth.
The mixture should resemble a thick dough that holds together easily when rolled.
Pro Tip: If the mixture feels too soft, refrigerate it for about 10 minutes before shaping.
Step 3 – Shape the Ghosts
Now comes the fun part — shaping your truffles into little ghost forms.
- Scoop small portions of the mixture (about 1 tablespoon each) and roll them into balls.
- To create ghost shapes, gently pinch the top of each ball to form a rounded head and let the bottom spread slightly.
- Place your shaped ghosts on a tray lined with parchment paper.
This doesn’t have to be perfect — their quirky shapes add to the Halloween charm!
Step 4 – Chill
Before coating the truffles, they need to firm up.
- Place the tray in the refrigerator for 15 minutes, or until the truffles are firm to the touch.
This step prevents them from falling apart during the chocolate-coating process.
Step 5 – Coat with Chocolate
Next, it’s time to give your truffles their ghostly white cloak.
- Place the 12 oz white chocolate in a microwave-safe bowl.
- Melt it in 20–30 second intervals, stirring between each session until completely smooth.
- Avoid overheating, as white chocolate can scorch easily.
- Alternatively, melt using a double boiler on the stovetop for more control.
- Using a fork or dipping tool, gently lower each chilled truffle into the melted chocolate.
- Coat evenly and allow excess chocolate to drip off before returning to the parchment paper.
Optional Tip: To make the coating extra glossy, add a teaspoon of coconut oil or shortening while melting.
Step 6 – Decorate
Before the coating hardens, decorate your truffles:
- Press candy eyes onto each ghost to give them personality.
- You can also use mini chocolate chips, edible markers, or dark chocolate to draw little mouths or expressions.
- If you prefer, add Halloween-themed sprinkles for a fun, colorful touch.
Let your creativity run wild — no two ghosts need to look the same!
Step 7 – Set & Serve
- Leave your decorated truffles at room temperature for about 30 minutes, or until the coating is completely hardened.
- Once set, transfer them to a serving platter or airtight container.
- These truffles can be stored in the refrigerator for up to one week.
Serve chilled or at room temperature — they’re delicious either way.
Nutritional Information (Per Truffle)
- Calories: 150
- Carbohydrates: 20 g
- Protein: 1 g
- Fat: 7 g
- Saturated Fat: 4 g
- Cholesterol: 15 mg
- Sodium: 85 mg
- Sugar: 15 g
- Calcium: 2 mg
- Iron: 2 mg
These Ghost OREO Ball Truffles may be indulgent, but their bite-sized portion makes them a perfect Halloween treat that won’t overwhelm after a big meal.
Tips for Perfect Ghost Truffles
Even though this recipe is simple, a few small details can make a big difference in the final look and texture.
- Use Full-Fat Cream Cheese:
Low-fat versions can be watery and affect the consistency of your truffles. - Keep the Mixture Cold:
If your kitchen is warm, chill the truffle dough halfway through shaping to prevent it from getting too soft. - Smooth Coating:
Make sure the white chocolate is fully melted and lump-free before dipping for an even, glossy finish. - Don’t Rush the Setting Time:
Let the coating firm up naturally; placing them in the freezer can cause the chocolate to crack. - Uniform Size:
Use a cookie scoop to make even-sized truffles — it helps them look professional and ensures consistent texture.
Creative Variations
While these truffles are delightful as ghosts, the basic OREO truffle recipe can easily be adapted for other occasions.
- Pumpkin OREO Truffles:
Use orange candy melts instead of white chocolate and decorate with green icing “stems” for a pumpkin look. - Mummy Truffles:
Drizzle extra white chocolate over the coated truffles in a zigzag pattern, then add candy eyes to resemble mummies. - Monster Truffles:
Use colored candy melts (green or purple) and stick on multiple eyes for a silly monster effect. - Christmas OREO Balls:
Dip in dark chocolate and top with red and green sprinkles for a festive winter version. - Valentine’s Day Version:
Use pink candy melts and heart sprinkles for a romantic twist. - Peanut Butter OREO Truffles:
Mix 2 tablespoons of peanut butter into the cream cheese mixture for an irresistible nutty flavor.
Serving Ideas
- Halloween Dessert Table:
Arrange your ghosts on a black platter, scatter candy corn around, and serve with dry ice or fog for a spooky presentation. - Party Favors:
Wrap each truffle in clear cellophane with orange and black ribbons — guests will love taking these home. - Kid-Friendly Activity:
Prepare the truffle base and let kids decorate their own ghosts with candy eyes, icing, or colored chocolate pens. - Pair with Drinks:
Serve alongside hot chocolate, pumpkin spice lattes, or apple cider for a comforting autumnal combination.
Storage and Shelf Life
To keep your truffles fresh and delicious:
- Refrigerate: Store in an airtight container for up to 7 days.
- Freeze: You can also freeze them for up to 2 months. To serve, thaw overnight in the refrigerator.
- Avoid Heat: Don’t leave them in direct sunlight or warm environments — the chocolate coating will melt.
Tip: If storing in layers, place parchment paper between each layer to prevent sticking.
Common Mistakes to Avoid
1. Overheating the Chocolate:
White chocolate burns easily. Always melt it gently in short intervals, stirring often.
2. Using Cold Cream Cheese:
Cold cream cheese won’t mix well with Oreo crumbs. Make sure it’s softened before combining.
3. Skipping the Chill Step:
If you don’t chill the truffles before coating, they can fall apart or lose their shape in the melted chocolate.
4. Not Letting the Coating Set:
Be patient! Rushing the setting process can lead to uneven or cracked coatings.
Troubleshooting Tips
- Chocolate Too Thick?
Stir in 1 teaspoon of vegetable oil or coconut oil to thin it out. - Truffles Falling Apart?
Chill the dough longer before dipping or add a few more Oreo crumbs to firm it up. - Lumpy Mixture?
Make sure your cream cheese is soft and well blended for a smooth filling.
Conclusion
Ghost OREO Ball Truffles are proof that you don’t need complex techniques or fancy equipment to create show-stopping desserts. These little no-bake treats are rich, creamy, and full of Halloween spirit. With just three main ingredients and a touch of imagination, you can transform simple Oreo cookies into charming edible ghosts that will delight kids and adults alike.
Whether you’re hosting a party, need a classroom snack, or simply want to add a festive touch to your October menu, these truffles are sure to impress. They’re fun to make, easy to customize, and disappear quickly from any dessert tray.
So, grab your Oreos, get a little spooky, and whip up a batch of Ghost OREO Ball Truffles that will haunt your taste buds—in the best way possible.
Frequently Asked Questions (FAQs)
Q1: Can I make Ghost OREO Ball Truffles ahead of time?
Yes! These truffles can be made up to 3 days in advance. Store them in the refrigerator until serving.
Q2: Can I use other cookies besides Oreos?
Absolutely. Try chocolate sandwich cookies, graham crackers, or even Biscoff cookies for a different twist.
Q3: What type of white chocolate works best?
Use high-quality white chocolate bars or melting wafers. Avoid candy melts with waxy textures unless you prefer a thicker coating.
Q4: Can I use a different filling instead of cream cheese?
Yes. Mascarpone cheese or peanut butter can work as alternatives, though the flavor and texture will differ slightly.
Q5: How can I make these truffles dairy-free?
Use dairy-free cream cheese and vegan white chocolate for a plant-based version.
Q6: My chocolate coating cracked — what happened?
This usually occurs when the truffles are too cold. Let them sit for a few minutes at room temperature before dipping.
Q7: Can I color the white chocolate?
Yes! Add oil-based food coloring to the melted white chocolate to create colorful ghosts or themed designs.
Q8: Can I freeze Ghost OREO Ball Truffles?
Definitely. Freeze them in an airtight container for up to 2 months. Thaw overnight in the refrigerator before serving.
Q9: How can I decorate without candy eyes?
Use mini chocolate chips, dark chocolate dots, or black icing to create eyes and spooky faces.
Q10: How long can they stay at room temperature?
For food safety, keep them out no longer than 2 hours. Always refrigerate after serving.
Final Thoughts
Ghost OREO Ball Truffles embody everything we love about Halloween treats — they’re fun, festive, and delightfully indulgent. From their creamy center to their smooth white chocolate shell, every bite feels like a little celebration. The fact that they’re no-bake and customizable makes them an ideal go-to for busy hosts and creative bakers alike.
Whether you’re crafting these with kids or adding a gourmet touch for an adult party, one thing’s for sure — these ghosts won’t be haunting your kitchen for long. They’ll vanish as soon as they hit the table!
Print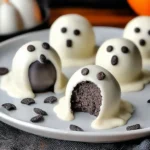
Ghost OREO Ball Truffles – Easy No-Bake Halloween Delights
- Total Time: 45 minutes
- Yield: 12 truffles
Description
Ghost OREO Ball Truffles are quick, no-bake Halloween treats that combine crushed Oreos, creamy cheesecake filling, and a smooth white chocolate coating. Fun to decorate and perfect for parties!
Ingredients
For the Truffle Mixture:
- 36 Oreo cookies (swap for gluten-free Oreos if needed)
- 8 oz cream cheese (use full-fat for a richer taste)
For the Chocolate Coating:
- 12 oz white chocolate (milk or dark chocolate also works)
For the Decoration:
- Sprinkles or edible candy eyes (optional)
Equipment:
- Food processor
- Mixing bowl
- Spatula
- Parchment paper
- Microwave-safe bowl
Instructions
- Make the Base: Add Oreo cookies to a food processor and pulse until fine crumbs form.
- Mix the Filling: In a bowl, combine Oreo crumbs with softened cream cheese until smooth.
- Shape the Ghosts: Scoop small portions and roll into balls. Shape each into a ghost form and place on a parchment-lined tray.
- Chill: Refrigerate for 15 minutes to firm up the truffles.
- Coat with Chocolate: Melt white chocolate in 20–30 second bursts, stirring until smooth. Dip each ghost into the melted chocolate, letting excess drip off.
- Decorate: Before the coating hardens, add sprinkles or edible eyes for decoration.
- Set & Serve: Allow truffles to sit at room temperature until the coating hardens (about 30 minutes).
Notes
- Store in the refrigerator for up to 5 days.
- For extra shine, add a teaspoon of coconut oil to the melted chocolate.
- Prep Time: 30 minutes
- Cook Time: 15 minutes
- Category: Dessert
- Method: No-Bake
- Cuisine: American