
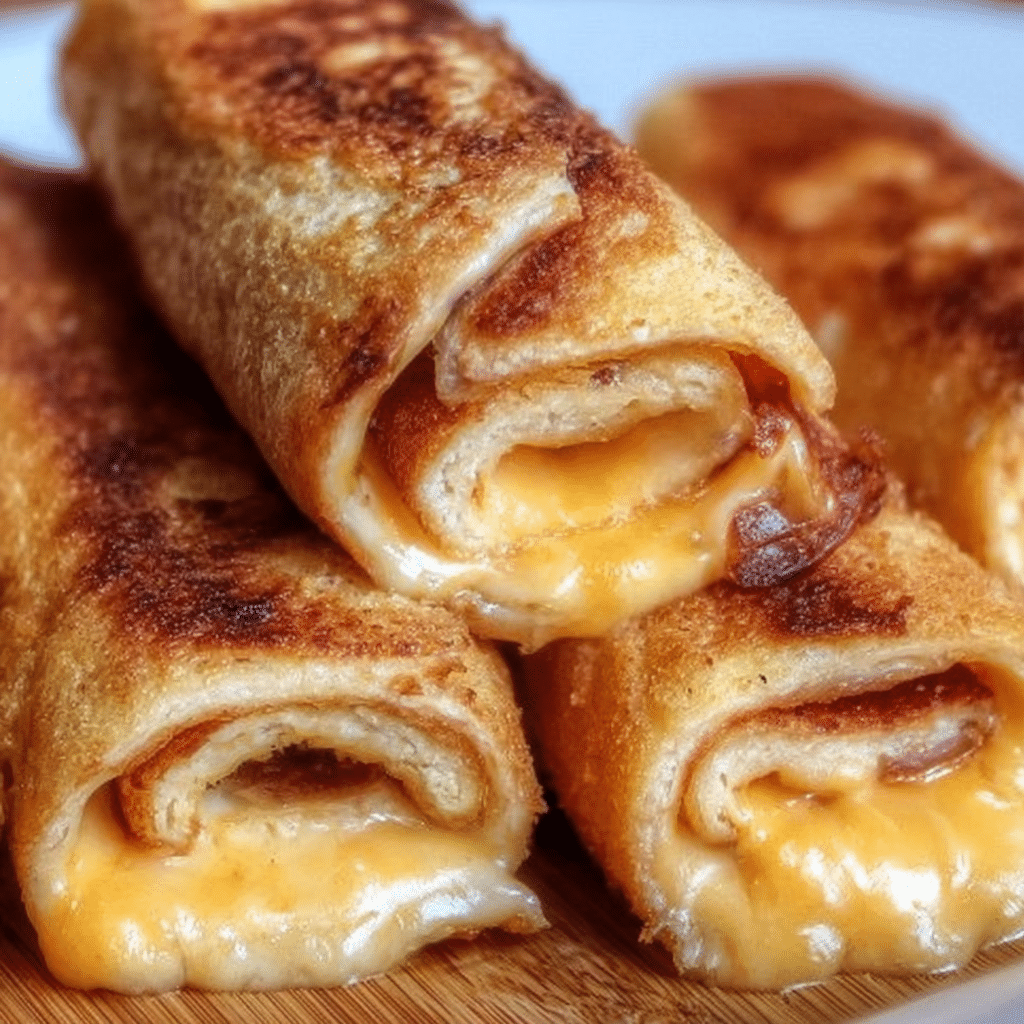
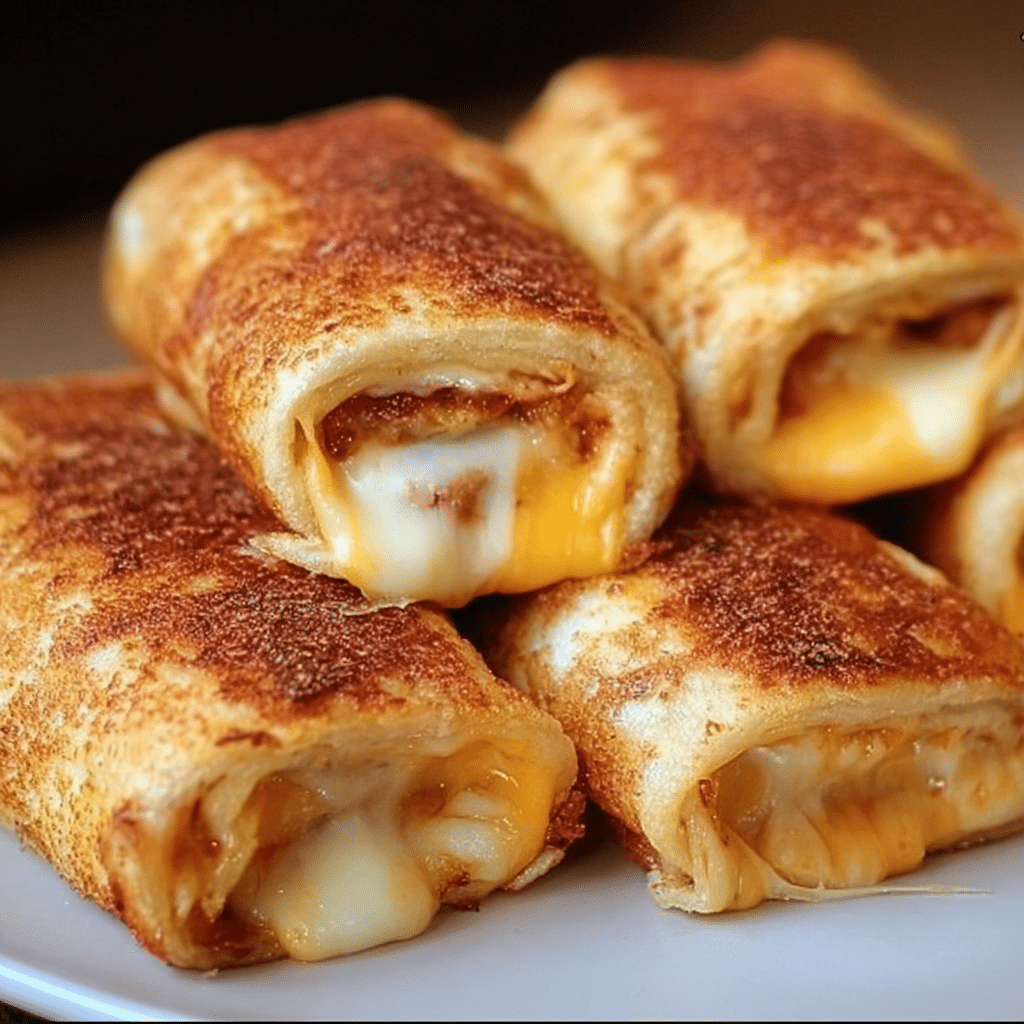
Few snacks or meals embody the perfect blend of comfort, nostalgia, and indulgence quite like a grilled cheese sandwich. From its golden, buttery exterior to the melty, stringy cheese inside, grilled cheese has long been a favorite in homes worldwide. But what if we could elevate this classic treat into something even more exciting and fun? Enter the Grilled Cheese Roll-Up – a creative twist on the traditional sandwich that delivers all the cheesy goodness you love in a perfectly bite-sized, portable, and visually appealing form.
Grilled Cheese Roll-Ups are versatile, customizable, and perfect for nearly any occasion. Whether you’re hosting a party, preparing a quick lunch for your kids, or just craving a satisfying snack for yourself, these roll-ups bring joy with every crispy, golden bite. Their compact size makes them ideal for dipping in sauces, stacking in lunch boxes, or serving as appetizers alongside salads or soups.
This recipe will guide you through every step of crafting perfect grilled cheese roll-ups, from selecting the right bread and cheese to mastering the rolling technique and achieving a golden, crispy exterior. Along the way, we’ll share tips, variations, and tricks to make sure every roll-up comes out looking and tasting spectacular.
Ingredients for Grilled Cheese Roll-Ups
The key to perfect roll-ups lies in using soft, fresh bread and melting cheese that stretches but doesn’t become greasy. Here’s a breakdown of the ingredients and tips for choosing the best options:
Bread
- 8–10 slices of soft white sandwich bread, crusts removed
- Tips:
- Softer bread rolls and flattens more easily without tearing.
- Brands like Wonder Bread or similar generic white bread work exceptionally well.
- Whole wheat bread can be used, but ensure it is soft and pliable.
Cheese
- 8–10 slices of your favorite melting cheese
- Classic options:
- Cheddar Cheese: Sharp or medium cheddar offers tangy flavor.
- American Cheese: Creamy, classic melty texture.
- Monterey Jack: Mild and buttery, melts perfectly.
- Colby Jack: Swirl of Colby and Monterey Jack, mild flavor and excellent melt.
- Provolone: Slightly smoky, melts beautifully.
- Tips:
- Slices are easier to roll neatly than shredded cheese.
- If using shredded cheese, avoid overfilling.
Butter
- 4–5 tablespoons unsalted butter, softened or melted
- Tips:
- Crucial for a golden-brown, crispy exterior.
- Salted butter can be used, but adjust seasoning accordingly.
Optional Seasonings
- Garlic powder: ¼ teaspoon mixed into butter adds aroma.
- Paprika: A pinch over cheese adds color and subtle smokiness.
- Dried Italian herbs: Sprinkle over cheese for Mediterranean flair.
Step-by-Step Preparation Method
Step 1: Prepare the Bread
- Remove the crusts from each slice using a sharp knife. This ensures a softer, more pliable surface for rolling.
- Place a slice of bread on a clean, flat surface. Using a rolling pin, flatten the bread to about 1/16–1/8 inch thickness.
- Roll in multiple directions for even thinness. Repeat with all slices.
Tip: If the bread tears, press gently with the rolling pin and patch the small holes by folding the edges slightly.
Step 2: Add the Cheese
- Take a slice of your chosen cheese. Trim it slightly if it’s larger than the bread.
- Place the cheese along one edge of the flattened bread, leaving a ¼ inch border on the sides.
- Add optional seasonings like paprika or Italian herbs over the cheese.
Tip: Rolling from the edge with the cheese ensures a compact cylinder and minimizes leakage.
Step 3: Roll ‘Em Up
- Start rolling from the cheese edge, keeping the roll tight.
- Pinch the seam gently or place it seam-down to hold shape.
- Repeat with all slices.
Tip: Tight rolls make flipping easier and prevent cheese from spilling during cooking.
Step 4: Butter the Rolls
Method 1: Brush melted butter evenly over the roll-ups.
Method 2: Spread softened butter gently with a knife.
Tip: Ensure every surface is coated for even crisping. Optional garlic powder can be mixed into the butter for extra flavor.
Step 5: Grill to Perfection
- Heat a non-stick skillet or griddle over medium-low to medium heat.
- Place the buttered roll-ups seam-side down in the skillet. Cook in batches to avoid overcrowding.
- Cook 2–4 minutes on the first side until golden brown. Flip carefully using tongs.
- Continue cooking 1–2 minutes per side until all sides are golden and crispy and cheese is fully melted.
Tip: Some cheese may ooze out – this creates delicious crispy edges.
Step 6: Serve Immediately
Remove from the skillet and place on a plate. Serve hot, when the bread is crispy and the cheese is perfectly melted.
Tip: Serve with marinara sauce, ranch, or honey mustard for dipping.
Tips for Perfect Grilled Cheese Roll-Ups
- Bread Quality: Fresh, soft bread makes rolling easier.
- Cheese Choice: Choose cheese that melts evenly. Combine cheeses for flavor complexity.
- Tight Rolling: Keeps cheese inside and ensures even cooking.
- Temperature Control: Medium heat prevents burning and allows thorough melting.
- Butter Coating: Ensure full coverage for golden, crispy exteriors.
Variations to Try
- Veggie Roll-Ups: Add thin slices of tomato, spinach, or roasted peppers before rolling.
- Spicy Roll-Ups: Sprinkle a pinch of cayenne or red pepper flakes inside.
- Breakfast Version: Add cooked bacon or ham slices.
- Herb Butter: Mix rosemary, thyme, or basil into the butter for aromatic roll-ups.
- Cheese Combos: Mix cheddar and mozzarella or provolone and Monterey Jack for different textures and flavors.
Nutritional Insights
- Serving Size: One roll-up
- Calories: 350–450 kcal
- Fat: 20–25g
- Carbohydrates: 30–35g
- Protein: 10–15g
Tip: Pair with a salad or fruit for a balanced snack or light meal.
Serving Suggestions
- Snack Time: Serve as a hot, cheesy treat with dipping sauces.
- Lunchbox Favorite: Compact and kid-friendly, perfect for school or work.
- Appetizers: Serve as bite-sized starters at parties.
- Soup Companion: Ideal alongside tomato or vegetable soups.

Grilled Cheese Roll-Ups – Crispy, Gooey Comfort in Every Bite
- Total Time: 18 minutes
- Yield: 8-10 roll-ups
- Diet: Vegetarian
Description
Grilled Cheese Roll Ups – Crispy on the outside, gooey on the inside! Perfect for a quick, comforting snack or lunch.
Ingredients
- 8–10 slices soft white sandwich bread, crusts removed
- 8–10 slices of your favorite melting cheese (Cheddar, American, Monterey Jack, Colby Jack, Provolone)
- 4–5 tbsp unsalted butter, softened or melted
- Optional seasonings: garlic powder (¼ tsp), paprika (pinch), dried Italian herbs (small sprinkle)
Instructions
- Carefully remove crusts from each bread slice. Flatten each slice with a rolling pin to about 1/16–1/8 inch thick.
- Place a cheese slice (or shredded cheese) along one edge of the bread. Sprinkle optional seasonings over the cheese.
- Roll the bread tightly into a cylinder. Pinch the seam if needed.
- Brush or spread softened/melted butter over each roll-up.
- Heat a non-stick skillet over medium-low to medium heat. Cook roll-ups seam-side down for 2–4 minutes until golden brown.
- Turn and cook on all sides for a total of 5–8 minutes until crispy and cheese is melted.
- Remove from skillet and serve immediately while hot and gooey.
Notes
- Use soft, fresh bread for easier rolling.
- Serve immediately for best texture.
- Optional: add extra herbs or spices for flavor variation.
- Prep Time: 10 minutes
- Cook Time: 8 minutes
- Category: Snack, Appetizer
- Method: Grill, Skillet
- Cuisine: American
Frequently Asked Questions (FAQs)
1. Can I use whole wheat or gluten-free bread?
Yes, but ensure it is soft and pliable to roll easily.
2. Can I make roll-ups ahead of time?
Yes, assemble and refrigerate for 1–2 hours before cooking. Avoid long storage to prevent soggy bread.
3. How do I keep them from unrolling?
Tight rolling, seam-side down in the pan, and pinching the seam helps maintain shape.
4. Can I freeze them?
Freeze unbaked roll-ups. Bake from frozen, adding a few extra minutes.
5. Can I add extra ingredients inside?
Yes! Thin vegetables, meats, or herbs work, but avoid overfilling.
6. What dipping sauces work best?
Marinara, ranch, honey mustard, or spicy ketchup complement the cheesy rolls.
Conclusion
Grilled Cheese Roll-Ups take the familiar comfort of a grilled cheese sandwich and transform it into a fun, portable, and indulgent snack. Perfect for parties, lunches, or a quick snack, these roll-ups are customizable, easy to prepare, and endlessly satisfying.
By following this guide, you can master the technique of rolling, buttering, and grilling to perfection, ensuring each roll-up is golden, crispy, and gooey. With tips, variations, and serving ideas included, this recipe offers something for everyone – from kids to adults, beginners to seasoned cooks.
Next time you crave melty, cheesy perfection, skip the ordinary sandwich and enjoy the grilled cheese roll-up experience – where every bite is crispy on the outside and oozing with comfort on the inside.
