A vintage heart cake is the perfect centerpiece for romantic occasions, weddings, anniversaries, or even Valentine’s Day. With its soft pastel colors, delicate decorations, and heart-shaped design, this cake combines elegance and charm, bringing a touch of nostalgia to any celebration.
Whether you’re a beginner or an experienced baker, this guide will take you step-by-step through baking the layers, preparing the frosting, assembling the cake, and adding gorgeous vintage-inspired decorations. By the end, you’ll have a cake that’s not only delicious but also visually stunning.
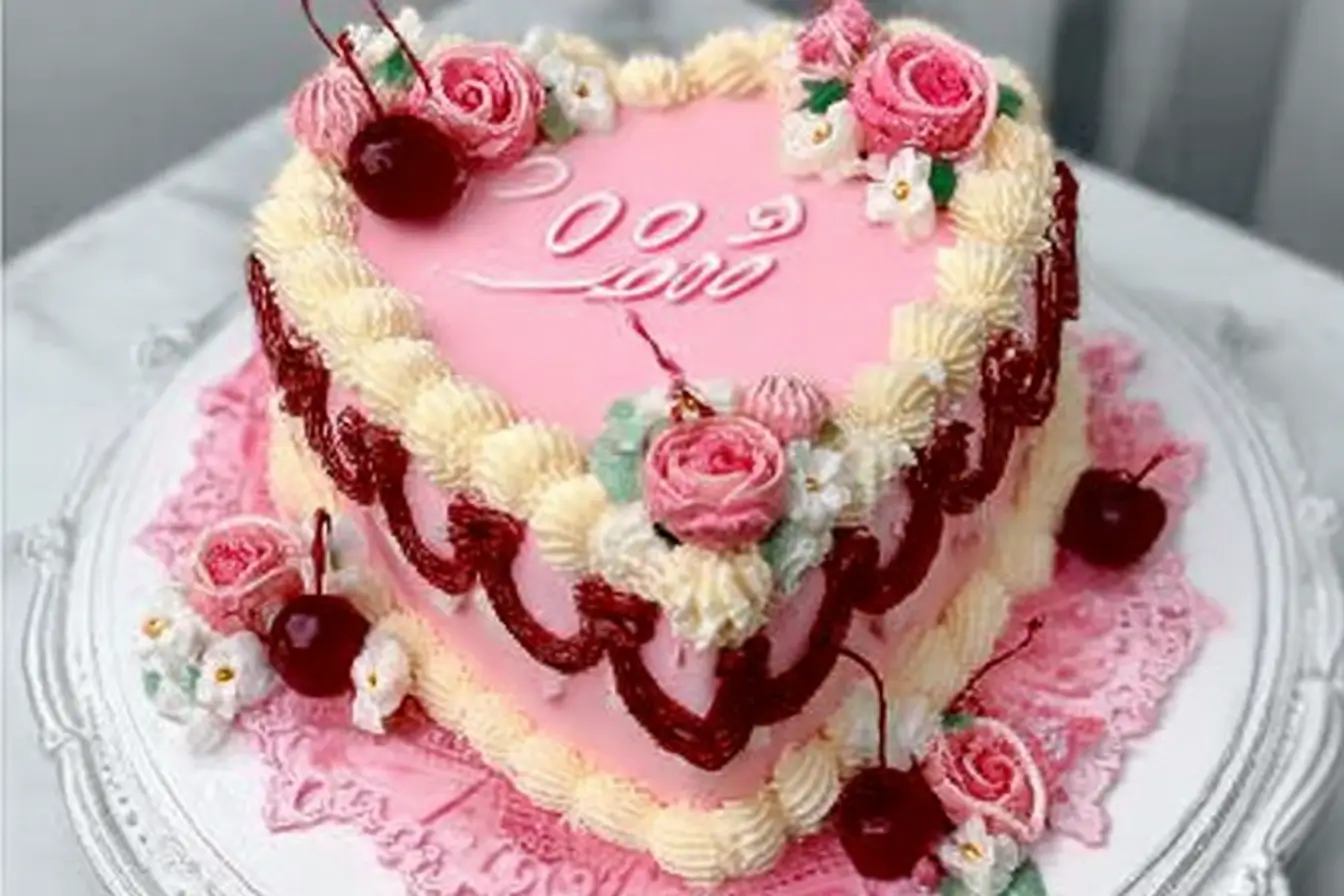
🎂 Why a Vintage Heart Cake?
The appeal of a vintage heart cake lies in its timeless elegance and personalized charm. Unlike modern geometric cakes or minimalistic designs, vintage cakes focus on romantic details — from buttercream lace and rosettes to pastel colors and edible flowers. They are designed to impress visually, but also taste incredible, with soft, moist layers and creamy frosting.
This cake is ideal for:
- Weddings or bridal showers
- Valentine’s Day celebrations
- Anniversaries or engagement parties
- Romantic gifts for a loved one
By following this guide, you can create a cake that is both a feast for the eyes and the palate.
🧁 Ingredients
You can make this cake using vanilla or chocolate layers, depending on your preference. Below are the detailed ingredients for the cake base, frosting, and optional decorations.
For the Cake Layers
- 2 ½ cups (315g) all-purpose flour
- 2 ½ tsp baking powder
- ½ tsp salt
- 1 cup (225g) unsalted butter, softened
- 2 cups (400g) granulated sugar
- 4 large eggs, room temperature
- 1 tbsp vanilla extract
- 1 cup (240ml) milk (whole milk or buttermilk for richness)
Optional: For chocolate layers, add 3 tbsp cocoa powder and reduce flour by 3 tbsp.
For the Buttercream Frosting
- 1 cup (230g) unsalted butter, softened
- 3–4 cups (375–500g) powdered sugar
- 2–3 tbsp heavy cream or milk
- 1 tsp vanilla extract
- Food coloring (soft pastel shades: pink, ivory, lavender)
Optional Decorations
- Edible flowers: roses, violets, hydrangeas
- Piped buttercream rosettes or lace designs
- Fondant accents: bows, hearts, pearls
- Edible glitter or gold dust for a vintage touch
These optional decorations elevate the cake, giving it a romantic, antique-inspired aesthetic.
Step-by-Step Instructions
Step 1: Prepare the Cake Batter
- Preheat your oven to 350°F (175°C).
- Grease and line your heart-shaped cake pans with parchment paper.
- In a medium bowl, whisk together flour, baking powder, and salt.
- In a separate large bowl, beat butter and sugar with an electric mixer until light and fluffy (2–3 minutes).
- Add eggs one at a time, mixing well after each addition. Stir in vanilla extract.
- Gradually alternate adding the dry ingredients and milk, mixing until smooth. Avoid overmixing to keep the cake tender.
For chocolate layers, fold in cocoa powder during this stage.
Step 2: Bake the Cake
- Divide the batter evenly between your prepared pans.
- Smooth the tops with a spatula.
- Bake for 25–30 minutes, or until a toothpick inserted in the center comes out clean.
- Let the cakes cool for 10 minutes in the pans, then transfer to a wire rack to cool completely.
Proper cooling ensures that the frosting will spread evenly without sliding.
Step 3: Prepare the Buttercream
- Beat softened butter on medium speed until creamy.
- Gradually add powdered sugar, one cup at a time.
- Mix in heavy cream or milk and vanilla extract, continuing to beat until fluffy.
- Add food coloring to achieve your desired pastel shades.
Tip: Use gel food coloring to maintain the frosting’s consistency.
Step 4: Assemble the Cake
- Level the cooled cake layers using a serrated knife.
- Place one layer on your cake board or serving plate.
- Spread a thin layer of frosting or filling on top.
- Place the second layer carefully on top.
- Apply a crumb coat — a thin layer of frosting that traps crumbs.
- Chill the cake for 30 minutes.
- Apply the final layer of frosting smoothly using an offset spatula.
A turntable is helpful for smooth sides and even frosting.
Step 5: Decorate Your Vintage Heart Cake
Decorating is where your cake transforms into a vintage masterpiece.
Buttercream Rosettes & Lace
- Use piping tips (like Wilton 1M or 2D) to pipe rosettes along the edges.
- Add delicate lace patterns to the sides for a classic antique look.
Edible Flowers
- Arrange roses, violets, or hydrangeas on top and around the sides.
- Ensure the flowers are food-safe and pesticide-free.
Fondant Accents
- Roll out fondant in soft pastel colors.
- Cut out bows, hearts, or pearls and attach using a dab of frosting.
Finishing Touches
- Lightly dust with edible glitter or gold dust for shimmer.
- Use pastel shades to highlight details and create a soft, romantic effect.
💡 Pro Tips for a Perfect Vintage Cake
- Chill your cake before decorating — makes frosting easier to smooth.
- Use room temperature ingredients for even mixing.
- Level your cake layers for a professional finish.
- Practice piping on parchment paper before decorating the cake.
- Store in a cool place — decorated cakes are best served within 2–3 days.
- Transport carefully — a chilled cake is less likely to shift or smudge.
🧁 Creative Variations
- Vanilla & Lavender: Use lavender extract in the batter and pale purple frosting.
- Chocolate & Pink: Cocoa layers with soft pink buttercream and rose decorations.
- Red Velvet: Classic red velvet base with ivory buttercream and edible pearls.
Mix and match colors, flavors, and decorations to create your own signature vintage cake.
🍴 Serving & Storage
- Serving: Use a sharp serrated knife for clean slices. Dip in hot water and wipe between cuts.
- Storage: Keep refrigerated, covered, for up to 3 days.
- Freezing: Unfrosted layers can be frozen up to 2 months. Thaw completely before frosting.
🎉 Final Thoughts
A vintage heart cake is a timeless, elegant dessert that brings both beauty and flavor to any celebration. Its soft, moist layers, creamy frosting, and delicate decorations make it perfect for romantic events, anniversaries, or as a personalized gift.
With attention to detail and creativity, even beginner bakers can achieve a stunning cake that looks like it came from a professional bakery.
❓ Frequently Asked Questions (FAQ)
1. Can I make the cake ahead of time?
Yes! Bake the layers 1–2 days in advance and store them wrapped at room temperature or in the fridge. Frost and decorate on the day of the event.
2. How do I achieve pastel colors?
Use gel food coloring sparingly. Mix a tiny amount into your buttercream until you reach the desired soft shade.
3. Can I use whipped cream instead of buttercream?
Yes, whipped cream frosting works beautifully for a lighter finish, though it’s less stable in warm conditions.
4. How do I keep the cake layers moist?
Use buttermilk, avoid overbaking, and brush layers with a simple syrup if needed.
5. Can I add edible flowers safely?
Yes, but make sure the flowers are organic, pesticide-free, and food-safe. Avoid non-edible varieties.
6. Can this cake be made gluten-free?
Yes, replace all-purpose flour with a 1:1 gluten-free baking blend. Adjust baking time slightly as needed.
7. How long will the cake stay fresh?
Decorated, it stays fresh in the fridge for 2–3 days. Unfrosted layers can be frozen for 1–2 months.
8. What decorations are best for beginners?
Buttercream rosettes, soft pastel coloring, and a few edible flowers are simple yet elegant for first-time decorators.
9. Can I make a tiered vintage heart cake?
Absolutely! Use cake boards and dowels for stability. Each tier can have complementary colors and decorations.
10. How do I transport the decorated cake?
Chill the cake first, place it in a sturdy box, and transport on a flat surface. Use non-slip mats to prevent movement.