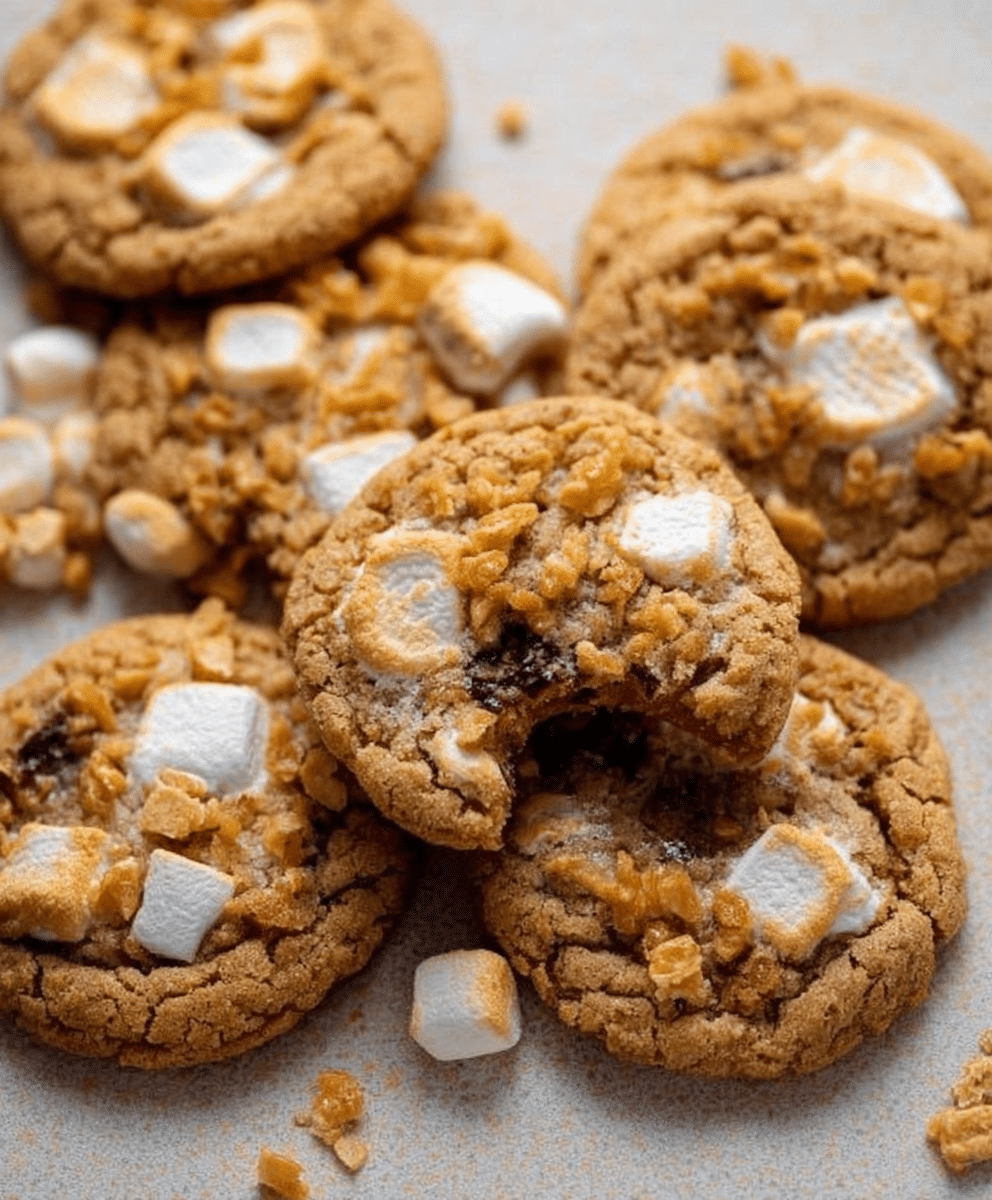
Let me paint you a picture. A cookie with deeply golden, nutty browned butter. Crisp, shattering edges. A soft, chewy center. Little pockets of melted marshmallow that stretch into glorious, gooey strings. And hidden throughout—an unexpected, delightful crunch from crispy rice cereal. These Brown Butter Marshmallow Crispy Cookies are not your average chocolate chip cookie. They’re something better.
Imagine the nostalgic joy of a Rice Krispies Treat colliding with a sophisticated, browned butter chocolate chip cookie. That’s exactly what’s happening here. The brown butter brings a toasty, caramel-like depth that transforms the dough from simple to spectacular. The crispy rice cereal stays light and crunchy, adding texture that surprises in the best way. And those mini marshmallows tucked around each dough ball? They melt into golden, sticky, glorious pools.
Whether you’re baking for a holiday cookie exchange, surprising your family on a rainy afternoon, or simply treating yourself because yes, you deserve it, these cookies deliver. No mixer required. No complicated steps. Just one saucepan, one bowl, and about 30 minutes to cookie bliss.
Why You’ll Love This Recipe
- Browned butter magic – It adds a nutty, toasty, almost caramel flavour that regular butter simply can’t match.
- Incredible texture – Crispy edges, chewy centers, crunchy cereal, and gooey marshmallow pockets. Every bite is different.
- No mixer needed – Just a whisk and a spatula. The dough comes together by hand in minutes.
- Nostalgic twist – Tastes like a Rice Krispies Treat grew up and fell in love with a bakery-style cookie.
- Crowd-pleaser – Kids adore the marshmallows and cereal. Adults swoon over the brown butter. Everyone wins.
Ingredients
- 1 cup unsalted butter – The star of the show. Unsalted lets you control the salt level. You’ll brown this to liquid gold.
- 1 cup brown sugar – Adds moisture, chewiness, and deep molasses notes. Light or dark brown sugar both work; dark gives richer flavour.
- ½ cup granulated sugar – Contributes to crispy edges and spread. Balances the molasses in the brown sugar.
- 2 large eggs – Provide structure, moisture, and richness. Bring them to room temperature for easier mixing.
- 2 teaspoons vanilla extract – Enhances the brown butter and adds warm, sweet depth. Use pure vanilla if you have it.
- 2¼ cups all-purpose flour – The structural backbone. Spoon and level for accuracy—don’t scoop directly from the bag.
- 1 teaspoon baking soda – Leavening agent that helps the cookies spread slightly and develop those crackly tops.
- ½ teaspoon salt – Balances the sweetness and amplifies the brown butter flavour. Use fine sea salt or table salt.
- 2 cups crispy rice cereal – The surprise crunch. Rice Krispies brand works perfectly, as do generic versions. Keep them whole; don’t crush.
- 1½ cups mini marshmallows – Small enough to melt quickly and distribute evenly. Regular-sized marshmallows chopped into quarters also work.
How to Make Brown Butter Marshmallow Crispy Cookies
Brown the Butter
Add the butter to a light-coloured saucepan (this helps you see the colour change). Melt it over medium heat, stirring occasionally. The butter will foam, then crackle, then subside. As the milk solids begin to brown, you’ll see golden flecks forming on the bottom of the pan and smell a distinct nutty, toasty aroma. This takes about 5–8 minutes. Watch carefully—browned butter can become burnt butter in seconds. Once the butter is a deep amber colour, remove it from the heat immediately. Pour it into a heatproof bowl and let it cool for 10 minutes. Do not skip the cooling step; hot butter will cook your eggs and sugar.
Mix the Wet Ingredients
In a large mixing bowl, whisk together the cooled browned butter, brown sugar, and granulated sugar. Whisk until smooth and well combined. The mixture will look glossy and slightly grainy. Add the eggs and vanilla extract, then mix until fully incorporated. The batter should be smooth and cohesive.
Combine the Dry Ingredients
In a separate bowl, stir together the flour, baking soda, and salt. This ensures the leavening and salt are evenly distributed throughout the dough.
Bring the Dough Together
Gradually add the dry ingredients to the wet ingredients, mixing with a spatula or wooden spoon until a soft dough forms. Do not overmix—stop as soon as no streaks of flour remain. Overmixing develops gluten and leads to tough cookies.
Fold in the Cereal
Add the crispy rice cereal to the dough. Fold gently using a spatula, taking care not to crush the cereal. You want mostly whole pieces for that satisfying crunch.
Shape the Cookies
Scoop the dough into balls using a cookie scoop (about 1.5 tablespoons each) or roll by hand. Place them on a parchment-lined baking sheet, spacing them about 2 inches apart. This recipe makes approximately 24 cookies.
Add the Marshmallows
Press mini marshmallows onto the top and around the sides of each dough ball. Don’t just sprinkle them on—press them in firmly so they become part of the cookie. You can use 4–6 marshmallows per cookie, depending on how gooey you want them. The marshmallows will melt and spread during baking, creating those signature golden pockets.
Bake
Preheat your oven to 350°F (175°C). Bake the cookies for 10 to 12 minutes, rotating the baking sheet halfway through. The cookies are ready when the edges are golden brown and the centers are just set (they will look slightly underdone—that’s perfect). The marshmallows will be puffed and deeply golden. Do not overbake; these cookies continue cooking on the hot sheet.
Cool and Transfer
Let the cookies cool on the baking sheet for 5 minutes. This allows them to set up before moving. After 5 minutes, transfer them to a wire rack to cool completely—or enjoy them warm while the marshmallows are still stretchy and soft.
Tips for Success
- Watch the butter like a hawk. Browned butter goes from perfect to burnt very quickly. As soon as it smells nutty and turns amber, pull it off the heat.
- Cool the browned butter for exactly 10 minutes. Too hot and it will scramble the eggs. Too cold and it won’t cream properly with the sugar. Set a timer.
- Use a light-coloured saucepan. Dark pans make it hard to see the butter’s colour change. Stainless steel or a light nonstick pan is ideal.
- Don’t crush the cereal. Fold gently. Those intact pieces are what give the cookies their signature crunch.
- Press marshmallows into the dough, not just on top. If marshmallows sit loosely on the surface, they’ll melt off and create burnt puddles on the baking sheet. Press them firmly into the sides.
- Underbake slightly for chewy centers. Pull the cookies when the edges are golden but the centers still look soft and slightly puffy. They will set as they cool.
Equipment Needed
- Light-coloured saucepan (for browning butter)
- Large mixing bowl
- Small mixing bowl (for dry ingredients)
- Whisk
- Spatula or wooden spoon
- Cookie scoop (1.5 tablespoon size) or regular spoon
- Baking sheet
- Parchment paper
- Wire cooling rack
Recipe Variations
Chocolate Lover’s Version
Add 1 cup of semi-sweet chocolate chips or chopped dark chocolate along with the crispy rice cereal. The chocolate pairs beautifully with the brown butter and marshmallows. For extra decadence, use chocolate mini marshmallows.
Peanut Butter Marshmallow Cookies
Replace ¼ cup of the browned butter with ¼ cup of creamy peanut butter (add it when you mix the sugars). Add ½ cup of chopped roasted peanuts along with the cereal. The salty, nutty contrast is incredible.
Salted Caramel Crispy Cookies
Add ½ cup of store-bought or homemade salted caramel bits (or chopped soft caramels) with the marshmallows. Sprinkle each cookie with flaky sea salt immediately after baking. The salt cuts through the sweetness beautifully.
Gluten-Free Version
Substitute the all-purpose flour with a high-quality 1:1 gluten-free baking flour blend (one that contains xanthan gum). Ensure your crispy rice cereal is gluten-free (Rice Krispies contain malt flavour; many store brands offer certified gluten-free versions).
Toasted Coconut Marshmallow
Add ¾ cup of unsweetened shredded coconut to the dough along with the cereal. Use coconut sugar instead of brown sugar for a deeper, tropical caramel flavour. Toast extra coconut flakes and sprinkle on top before baking.
Serving Suggestions
These cookies are spectacular on their own, but a few small touches make them even more memorable:
- With a glass of cold milk – Classic for a reason. The milk tames the sweetness and complements the brown butter.
- Alongside coffee or espresso – The bitterness of coffee balances the marshmallow’s sweetness perfectly.
- As an ice cream sandwich – Sandwich a scoop of vanilla or salted caramel ice cream between two cookies. Press gently and freeze for 15 minutes.
- Warm with a drizzle of caramel sauce – Microwave a cookie for 8–10 seconds, then drizzle with warm caramel. Pure indulgence.
For gifting, stack these cookies in a clear cellophane bag tied with ribbon. They stay fresh for days (if they last that long).
FAQs
Why brown the butter? Isn’t regular butter fine?
Regular butter is fine, but browned butter is extraordinary. The browning process creates hundreds of new flavour compounds—nutty, toasty, caramel-like—that elevate a simple cookie into something unforgettable. Once you try browned butter cookies, you may never go back.
Can I use salted butter?
Yes, but reduce the added salt to ¼ teaspoon. Salted butter typically contains about ⅛ teaspoon of salt per half cup. The extra salt won’t hurt, but it may make the cookies slightly more savoury.
My dough is very soft and sticky. Is that normal?
Yes, especially if the browned butter was still slightly warm when you mixed it. Chill the dough for 20–30 minutes in the refrigerator before scooping. This makes it easier to handle and prevents excessive spreading.
Can I freeze the dough?
Absolutely. Scoop the dough into balls and press marshmallows onto each one. Place the dough balls on a parchment-lined baking sheet and freeze until solid (about 2 hours). Transfer to a freezer bag. Bake from frozen at 350°F for 12–14 minutes—no need to thaw.
Why did my marshmallows burn?
Two common culprits: the marshmallows were pressed too loosely and slid off the cookie onto the baking sheet, or the oven temperature was too high. Press marshmallows firmly into the dough, and use an oven thermometer to verify your oven’s accuracy.
Can I use regular marshmallows instead of mini?
Yes. Cut each regular marshmallow into quarters using kitchen shears (they’re sticky, so spray the shears with non-stick spray first). You’ll need about 6 regular marshmallows, quartered.
How do I store these cookies?
Store in an airtight container at room temperature for up to 5 days. The crispy rice cereal will soften slightly over time, but the cookies remain delicious. To re-crisp them, warm in a 300°F oven for 3–4 minutes.
Can I make these without eggs?
For an egg-free version, replace each egg with a “flax egg” (1 tablespoon ground flaxseed mixed with 3 tablespoons water, let sit for 5 minutes). The texture will be slightly denser and more crumbly, but still very good.
Final Thoughts
These Brown Butter Marshmallow Crispy Cookies are the kind of recipe that becomes an instant classic the moment you pull them from the oven. The smell alone—toasted butter, vanilla, toasty cereal—will draw everyone in the house to the kitchen. The first bite delivers a symphony of textures: crisp edges, a chewy centre, gooey marshmallow pockets, and that surprising, delightful crunch of rice cereal.
They’re nostalgic without being childish. Sophisticated without being fussy. And they come together with no mixer, no chilling (unless you want to), and no hard-to-find ingredients. Brown butter is your superpower here. Use it wisely.
Print
Brown Butter Marshmallow Crispy Cookies: The Ultimate Buttery, Gooey, Crunchy Dream
- Total Time: 27 minutes
- Yield: 24 cookies
- Diet: Vegetarian
Description
Brown Butter Marshmallow Crispy Cookies – the ultimate cookie mashup! Nutty brown butter, chewy edges, crispy rice cereal, and gooey marshmallows create an irresistible texture combination. Part chocolate chip cookie, part Rice Krispie treat, these cookies are pure magic in every bite.
Ingredients
- 1 cup unsalted butter
- 1 cup brown sugar
- 1/2 cup granulated sugar
- 2 large eggs
- 2 teaspoons vanilla extract
- 2 1/4 cups all-purpose flour
- 1 teaspoon baking soda
- 1/2 teaspoon salt
- 2 cups crispy rice cereal
- 1 1/2 cups mini marshmallows
Instructions
- Add the butter to a saucepan over medium heat and cook until it turns golden brown and smells nutty. Remove from the heat and let it cool for 10 minutes.
- In a large mixing bowl, whisk together the browned butter, brown sugar, and granulated sugar until smooth.
- Add the eggs and vanilla extract, then mix until fully combined.
- In a separate bowl, stir together the flour, baking soda, and salt.
- Gradually mix the dry ingredients into the wet ingredients until a soft dough forms.
- Fold in the crispy rice cereal gently so it stays light and crisp.
- Scoop the dough into balls and place them on a parchment-lined baking sheet. Press mini marshmallows on top and around the sides of each dough ball.
- Bake at 350°F for 10 to 12 minutes, until the edges are golden and the centers are just set.
- Let the cookies cool on the baking sheet for 5 minutes before transferring to a wire rack.
Notes
- Watch the butter carefully while browning – it can go from perfect to burned in seconds. Look for amber color and nutty aroma.
- Let browned butter cool for 10 minutes before adding to sugars to prevent melting the sugars too much.
- Fold cereal gently to keep it from crushing into powder – you want distinct crispy pieces.
- Press marshmallows into the tops and sides of dough balls rather than inside for gooey pockets and toasted edges.
- Cookies will look slightly underdone in the centers when you pull them out – they’ll set as they cool.
- Store in an airtight container at room temperature for up to 5 days.
- These cookies freeze well for up to 3 months.
- For extra flavor, add 1/2 cup white chocolate chips or dark chocolate chunks.
- Prep Time: 15 minutes
- Cook Time: 12 minutes
- Category: Dessert, Cookies
- Method: Bake
- Cuisine: American
So preheat that oven, watch your butter like a hawk, and get ready to bake a batch of cookies that will disappear faster than you thought possible. When you make them—and you should make them—leave a review, share your photos, or tell me if you added chocolate chips. Happy baking